Sourdough Starter for Beginners- No Scale Needed
How to Make a Sourdough Starter from Scratch For Beginners

How to Make a Sourdough Starter from Scratch for Beginners
There’s nothing quite like the satisfaction of creating your own sourdough starter. It's more than just a recipe—it's an experience that connects you to the roots of homemade bread, just like raising your very own kitchen pet. With each day that passes, you’ll watch as your starter grows and evolves, rewarding you with the ultimate gift: fresh, homemade sourdough bread. If you've always wanted to try making sourdough but felt overwhelmed by the process, don’t worry—I’ve got you covered. This guide is beginner-friendly and designed to make your sourdough journey as smooth and stress-free as possible. From the first loaf of sourdough bread to your own active sourdough starter, you’ll soon be baking with confidence!
For me, making sourdough is much more than a baking project—it’s a personal connection to my past. As a child, I vividly remember my Grandpa Harvey, who always had a sourdough starter bubbling away on his kitchen counter. The scent of freshly baked sourdough bread filled the house, and each loaf felt like a little piece of home and magic. I like to think that by continuing to care for my own sourdough starter, I’m preserving a piece of Grandpa Harvey with me. That’s why I’ve named my starter "Harvey" in his honor. Naming your starter can add personality to the process—after all, your starter is alive, requires care, and grows like a beloved pet.
Creating your own starter takes time—about seven days—but it’s completely worth the effort. With just flour, warm water, and a bit of patience, you’ll soon have a bubbly, active sourdough starter ready to bake your first loaf of sourdough bread. By the end of this process, you’ll not only have learned how to make your sourdough starter from scratch, but you’ll also have a deeper understanding of the fermentation process, the importance of the right temperature in your kitchen, and how your starter evolves.
Throughout this guide, I’ll walk you through a simple, step-by-step process, ensuring you have all the necessary tools and tips. To help you stay on track, I’ve created a downloadable, free PDF with a seven-day schedule and checklist. This will make tracking your progress easy and ensure you’re following the best practices for the perfect starter. Whether it’s understanding if you use warm water or cold water or if the starter should be runny or thick, I’ll make sure that your sourdough journey is easy and foolproof. Let’s make it fun, simple, and rewarding!
Keep reading, and I’ll walk you through a simple, step-by-step guide with everything you need to get started- plus my best tips and tricks to make the process smooth and stress-free. Look for my FREE download 7 day sourdough starter schedule to help you on your journey!
What You’ll Need
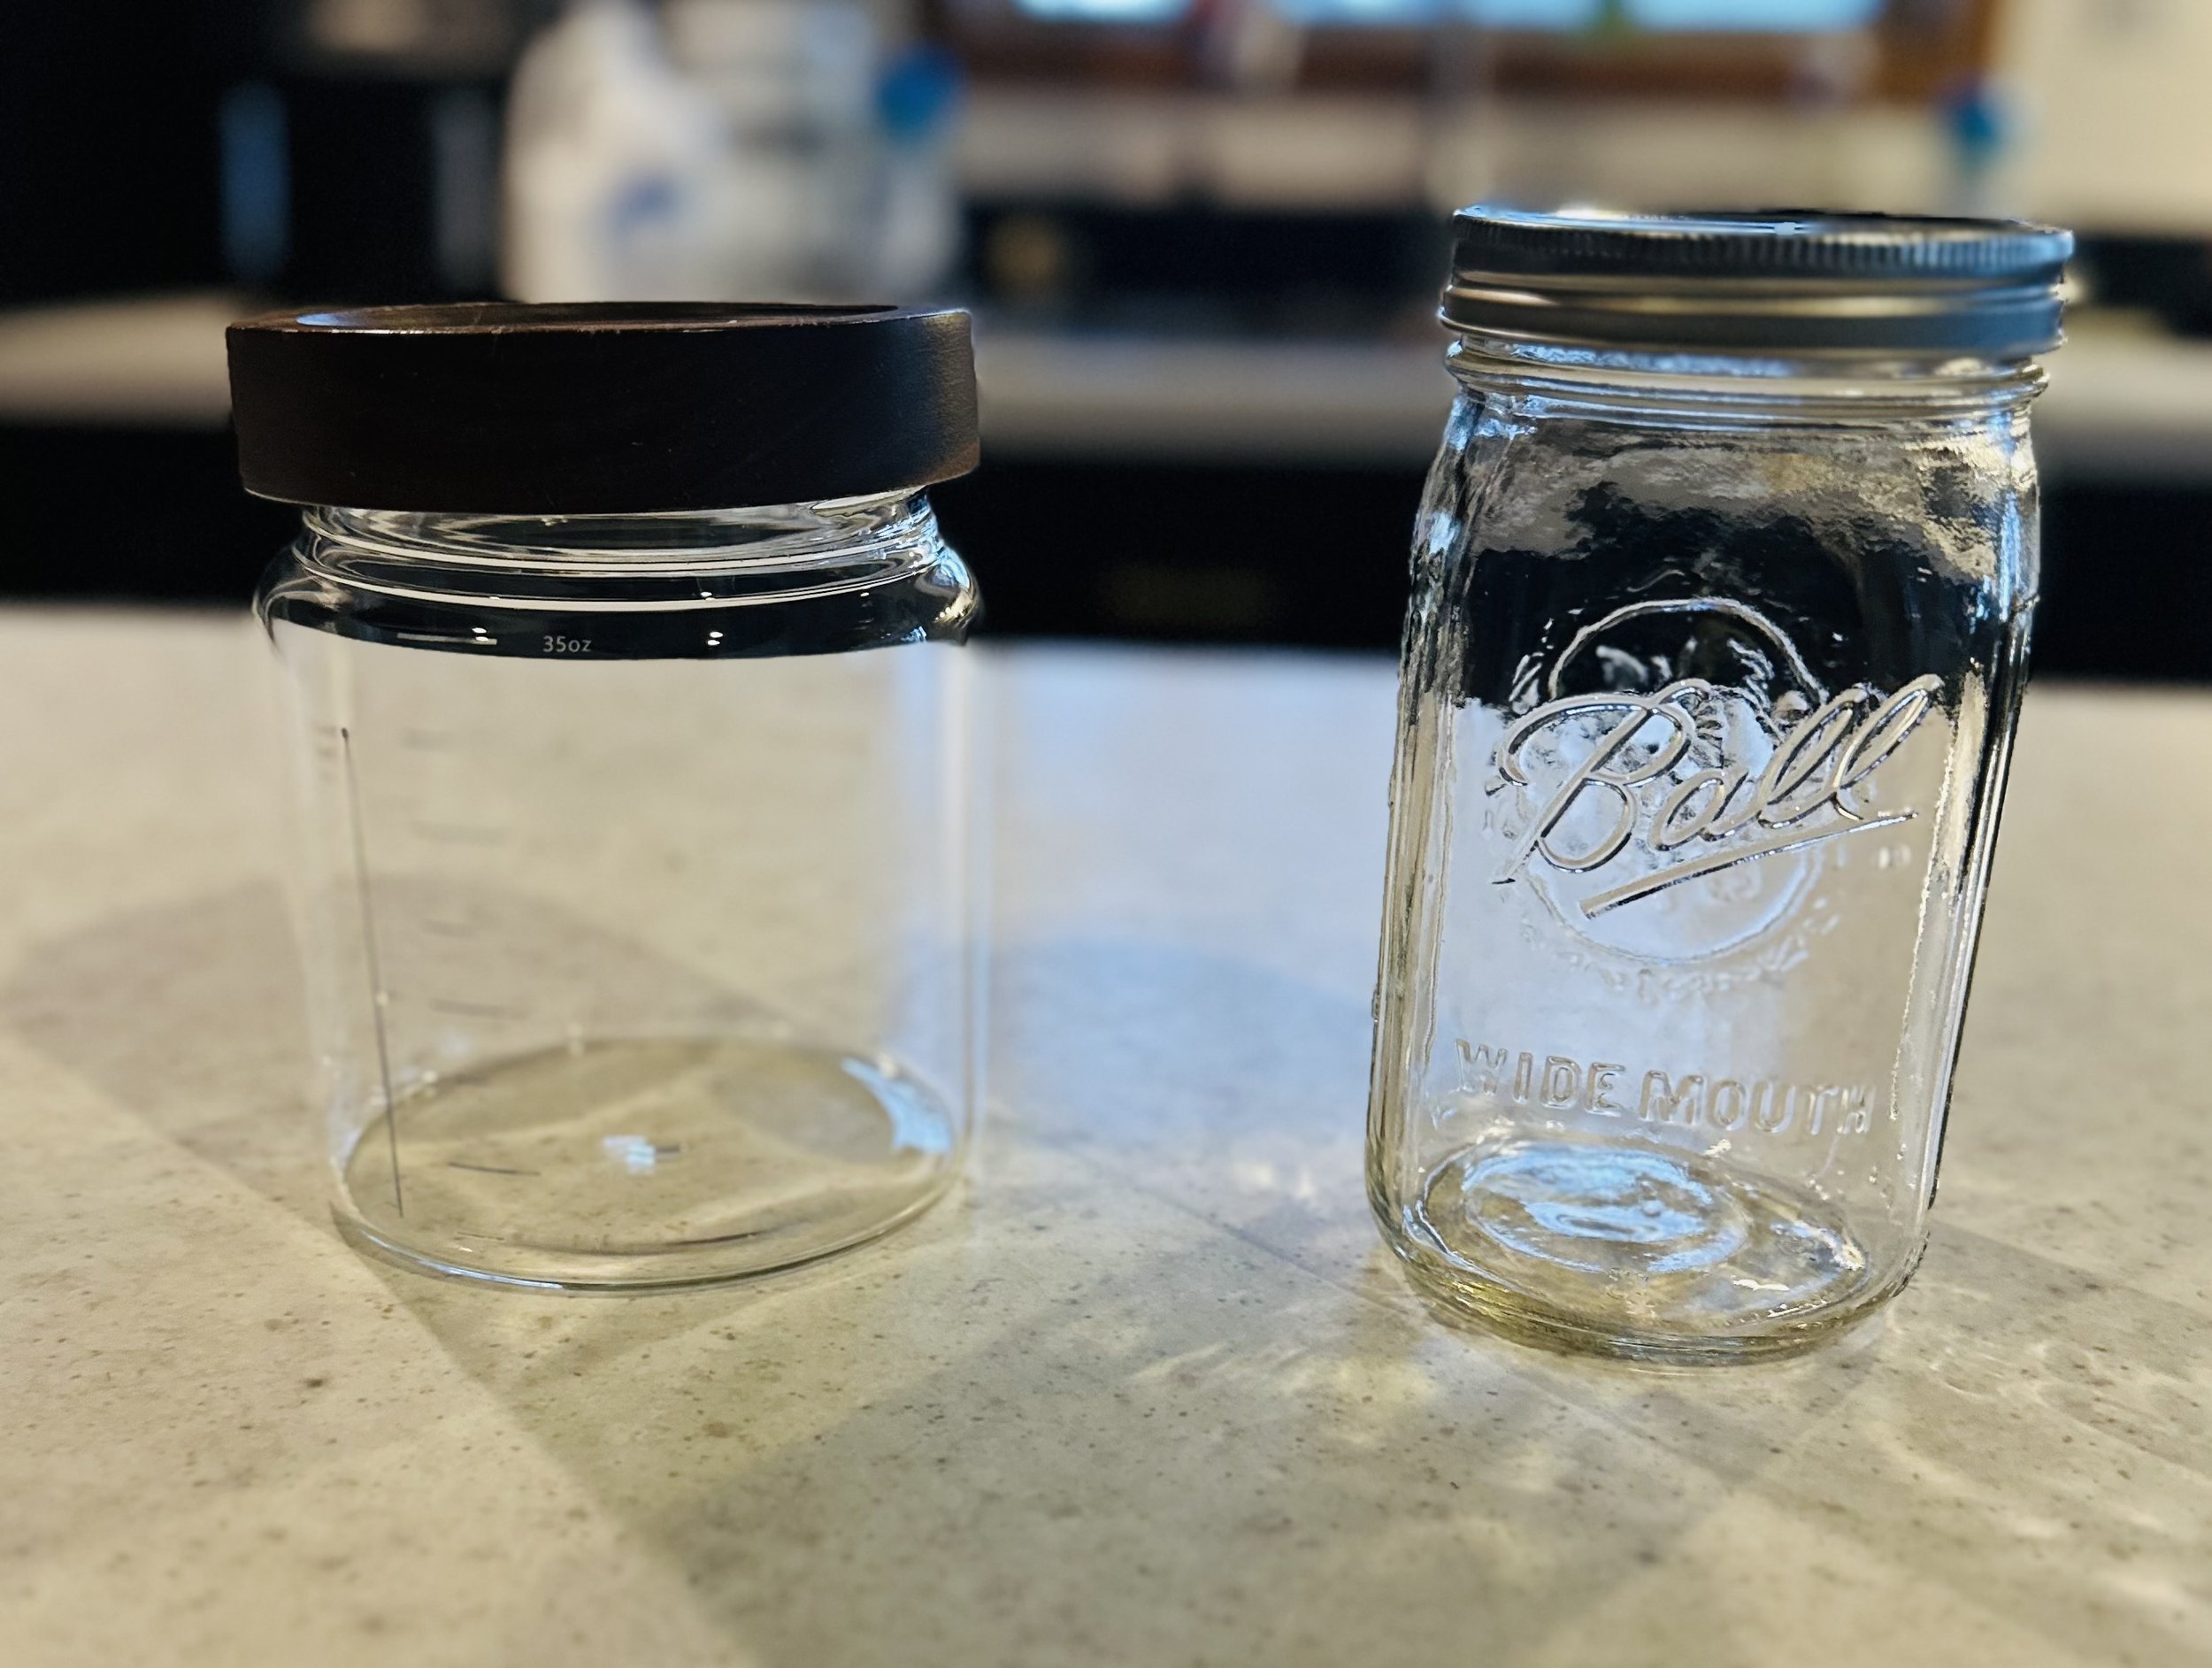
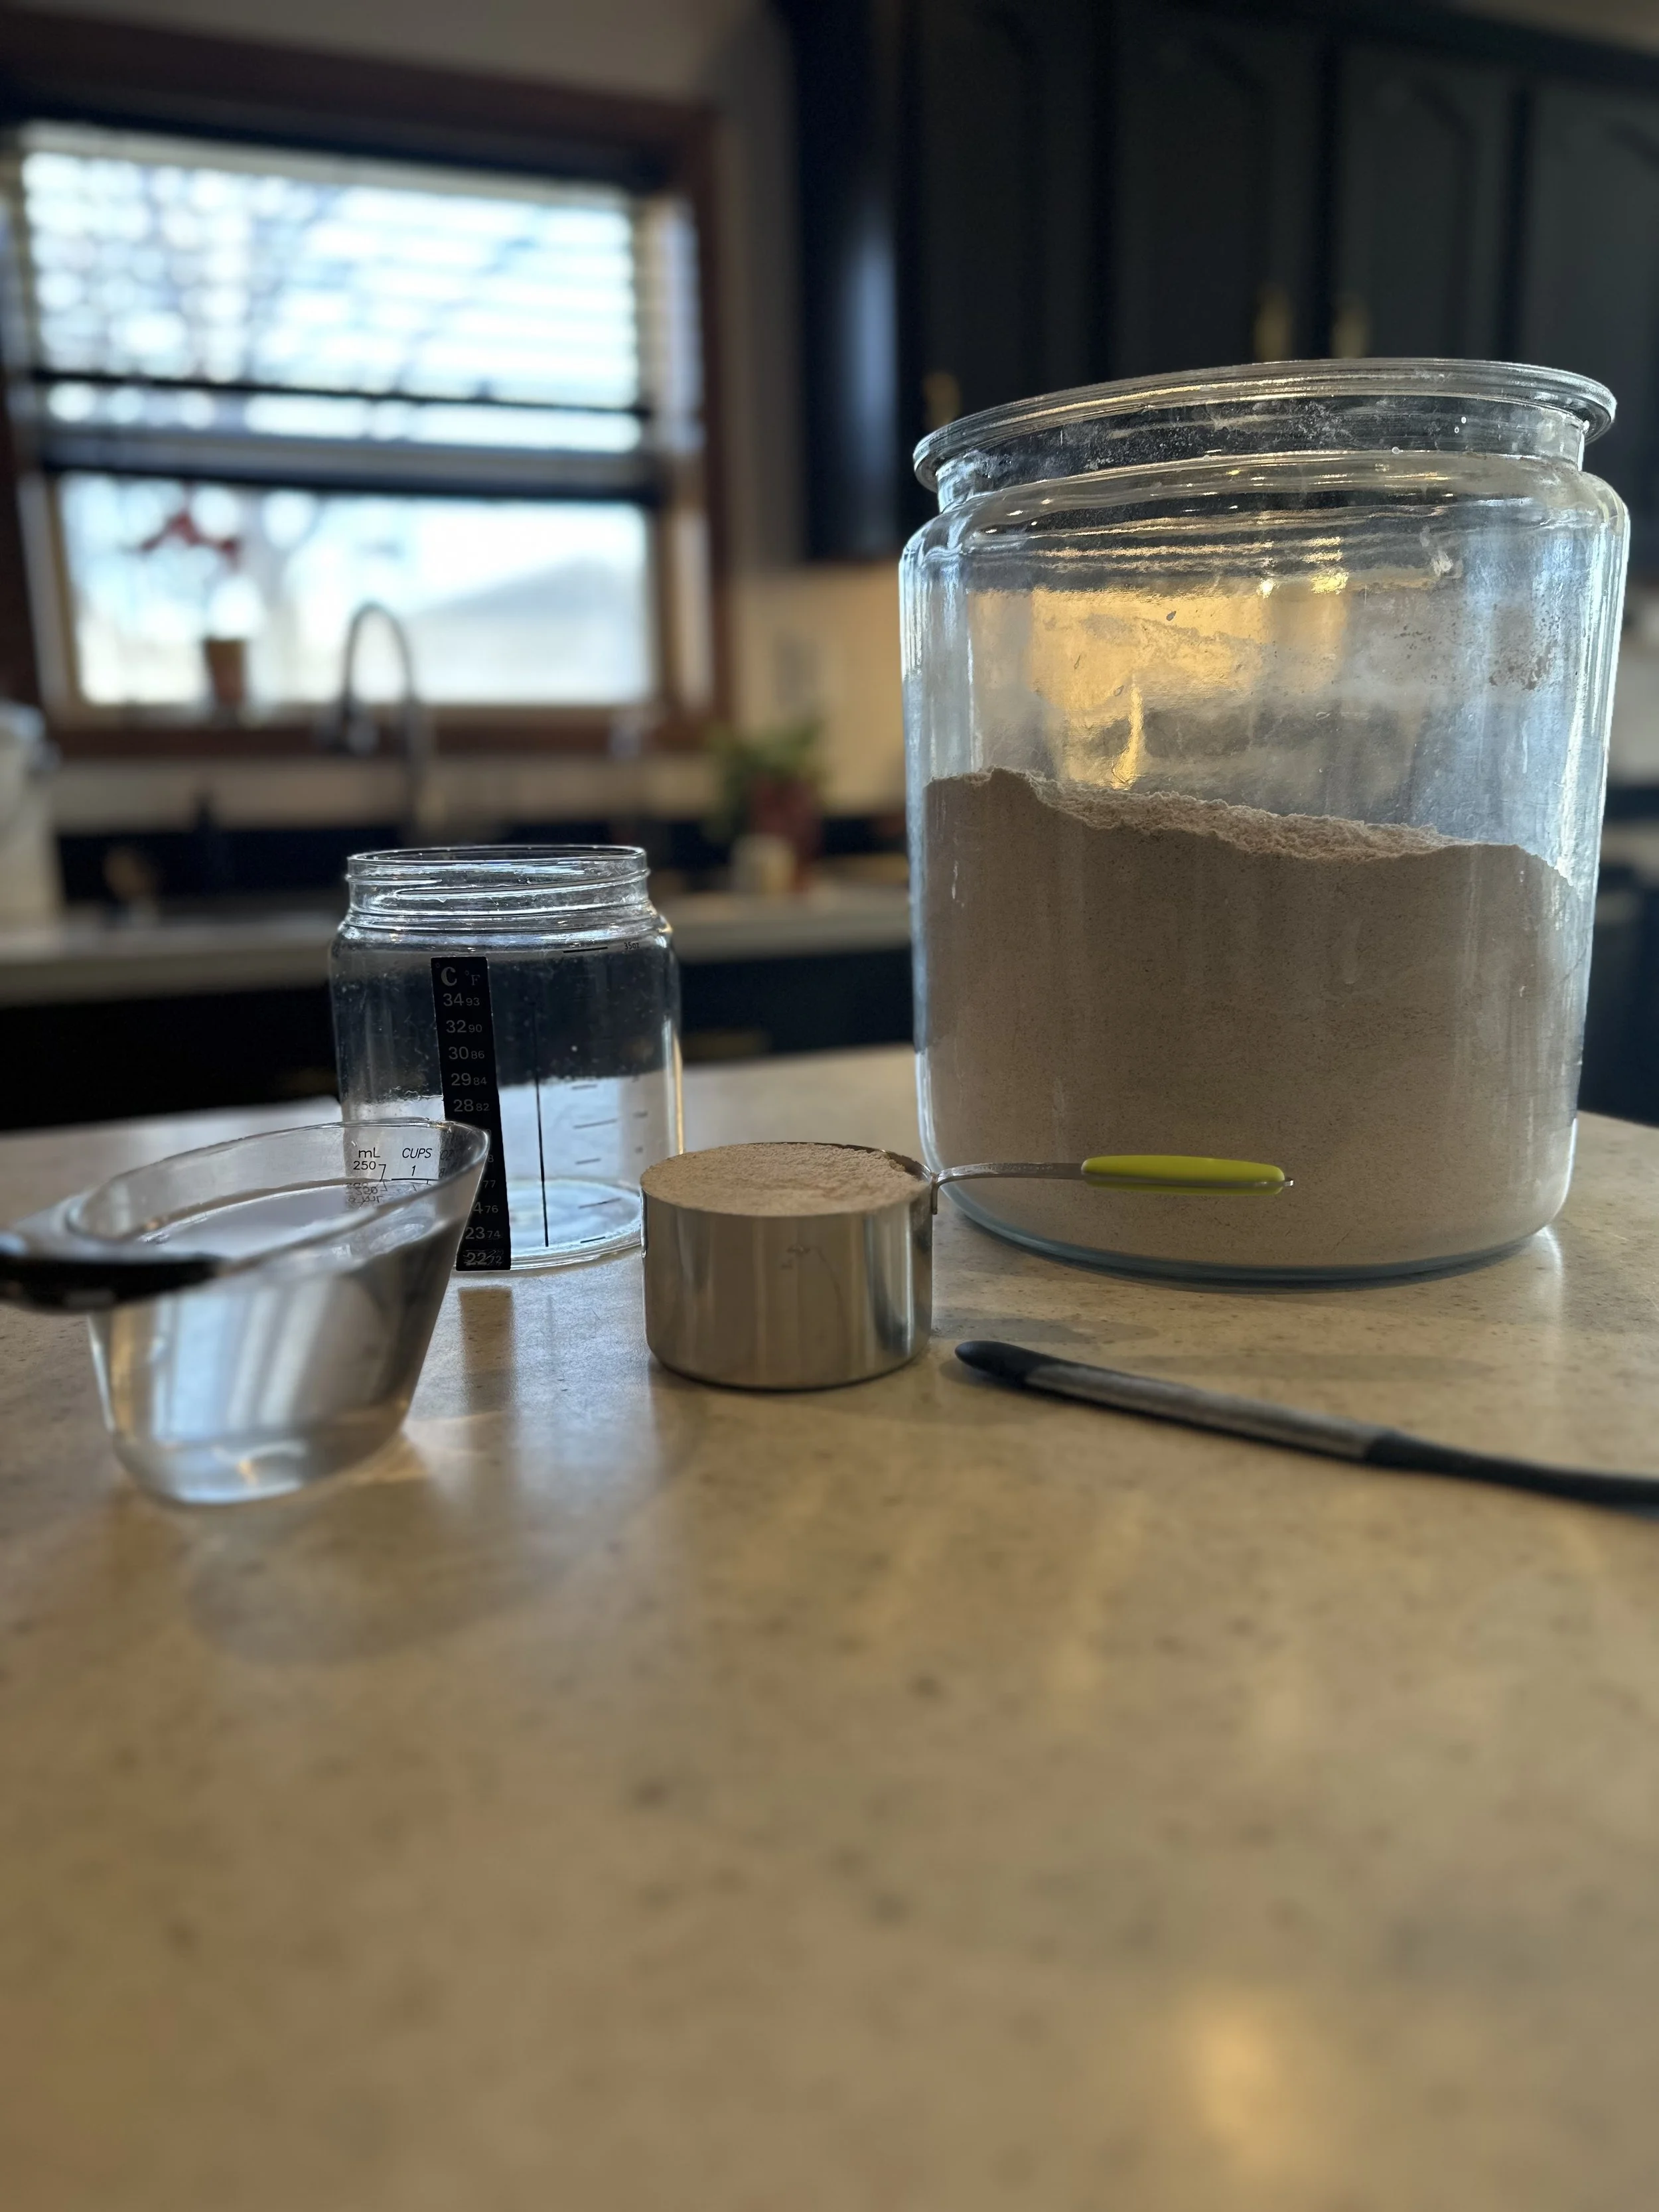
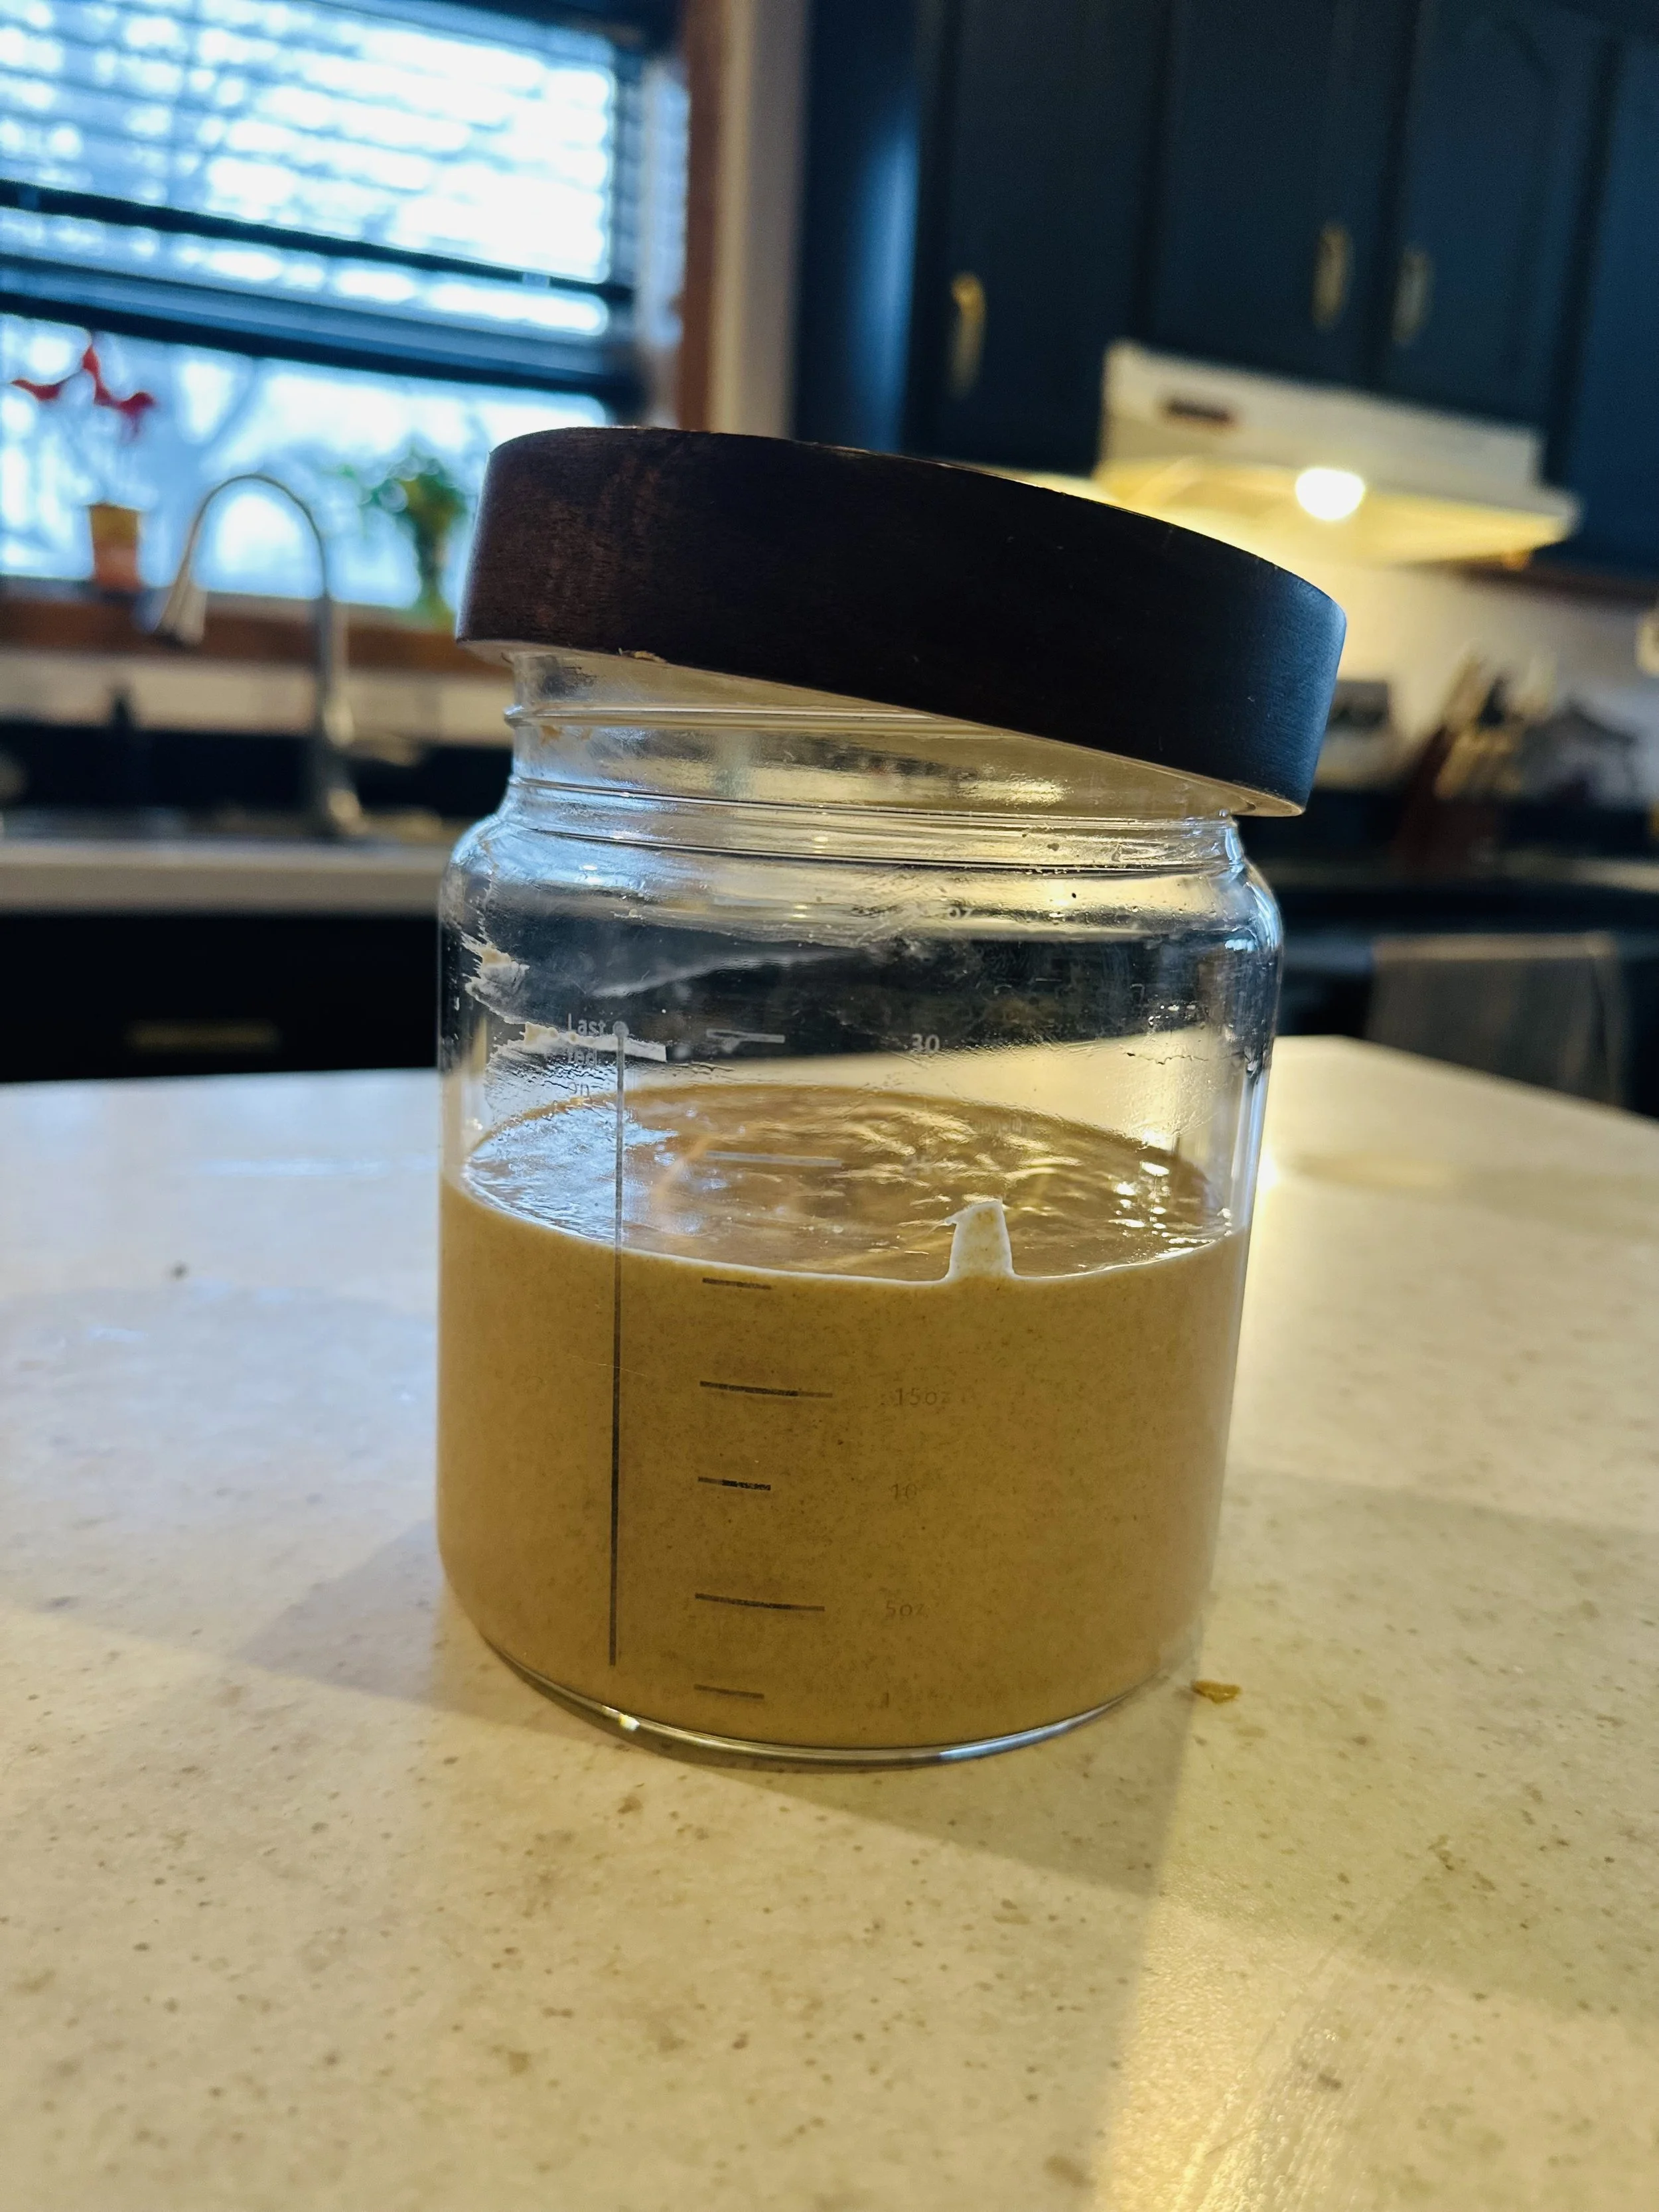
Storage Jars: A quart-sized mason jar is ideal for your sourdough starter. It provides ample space for expansion, allowing your starter to grow and develop properly. The glass also allows for better airflow, which is crucial in the fermentation process. Avoid using metal containers, as the acidity of your starter can react with the metal, potentially affecting the health of your starter. My favorite jar to use I've used isn't a mason jar, but it is ideal for sourdough starters, it has a band that marks the day and time you've fed, measurement in ounces, and a temperature magnant, and the wood lid adds the right amount of character, making my sourdough starter a "design" in the kitchen. I'll link it here if you want to check it out.
Flour: Whole wheat flour or rye flour works best for the initial stages of activating your starter. These types of flour contain more natural yeasts and nutrients, which help to jump-start the fermentation process. As your starter becomes more active, you can transition to a mixture of bread flour and all-purpose flour, but whole-grain flours give your starter a strong and healthy beginning.
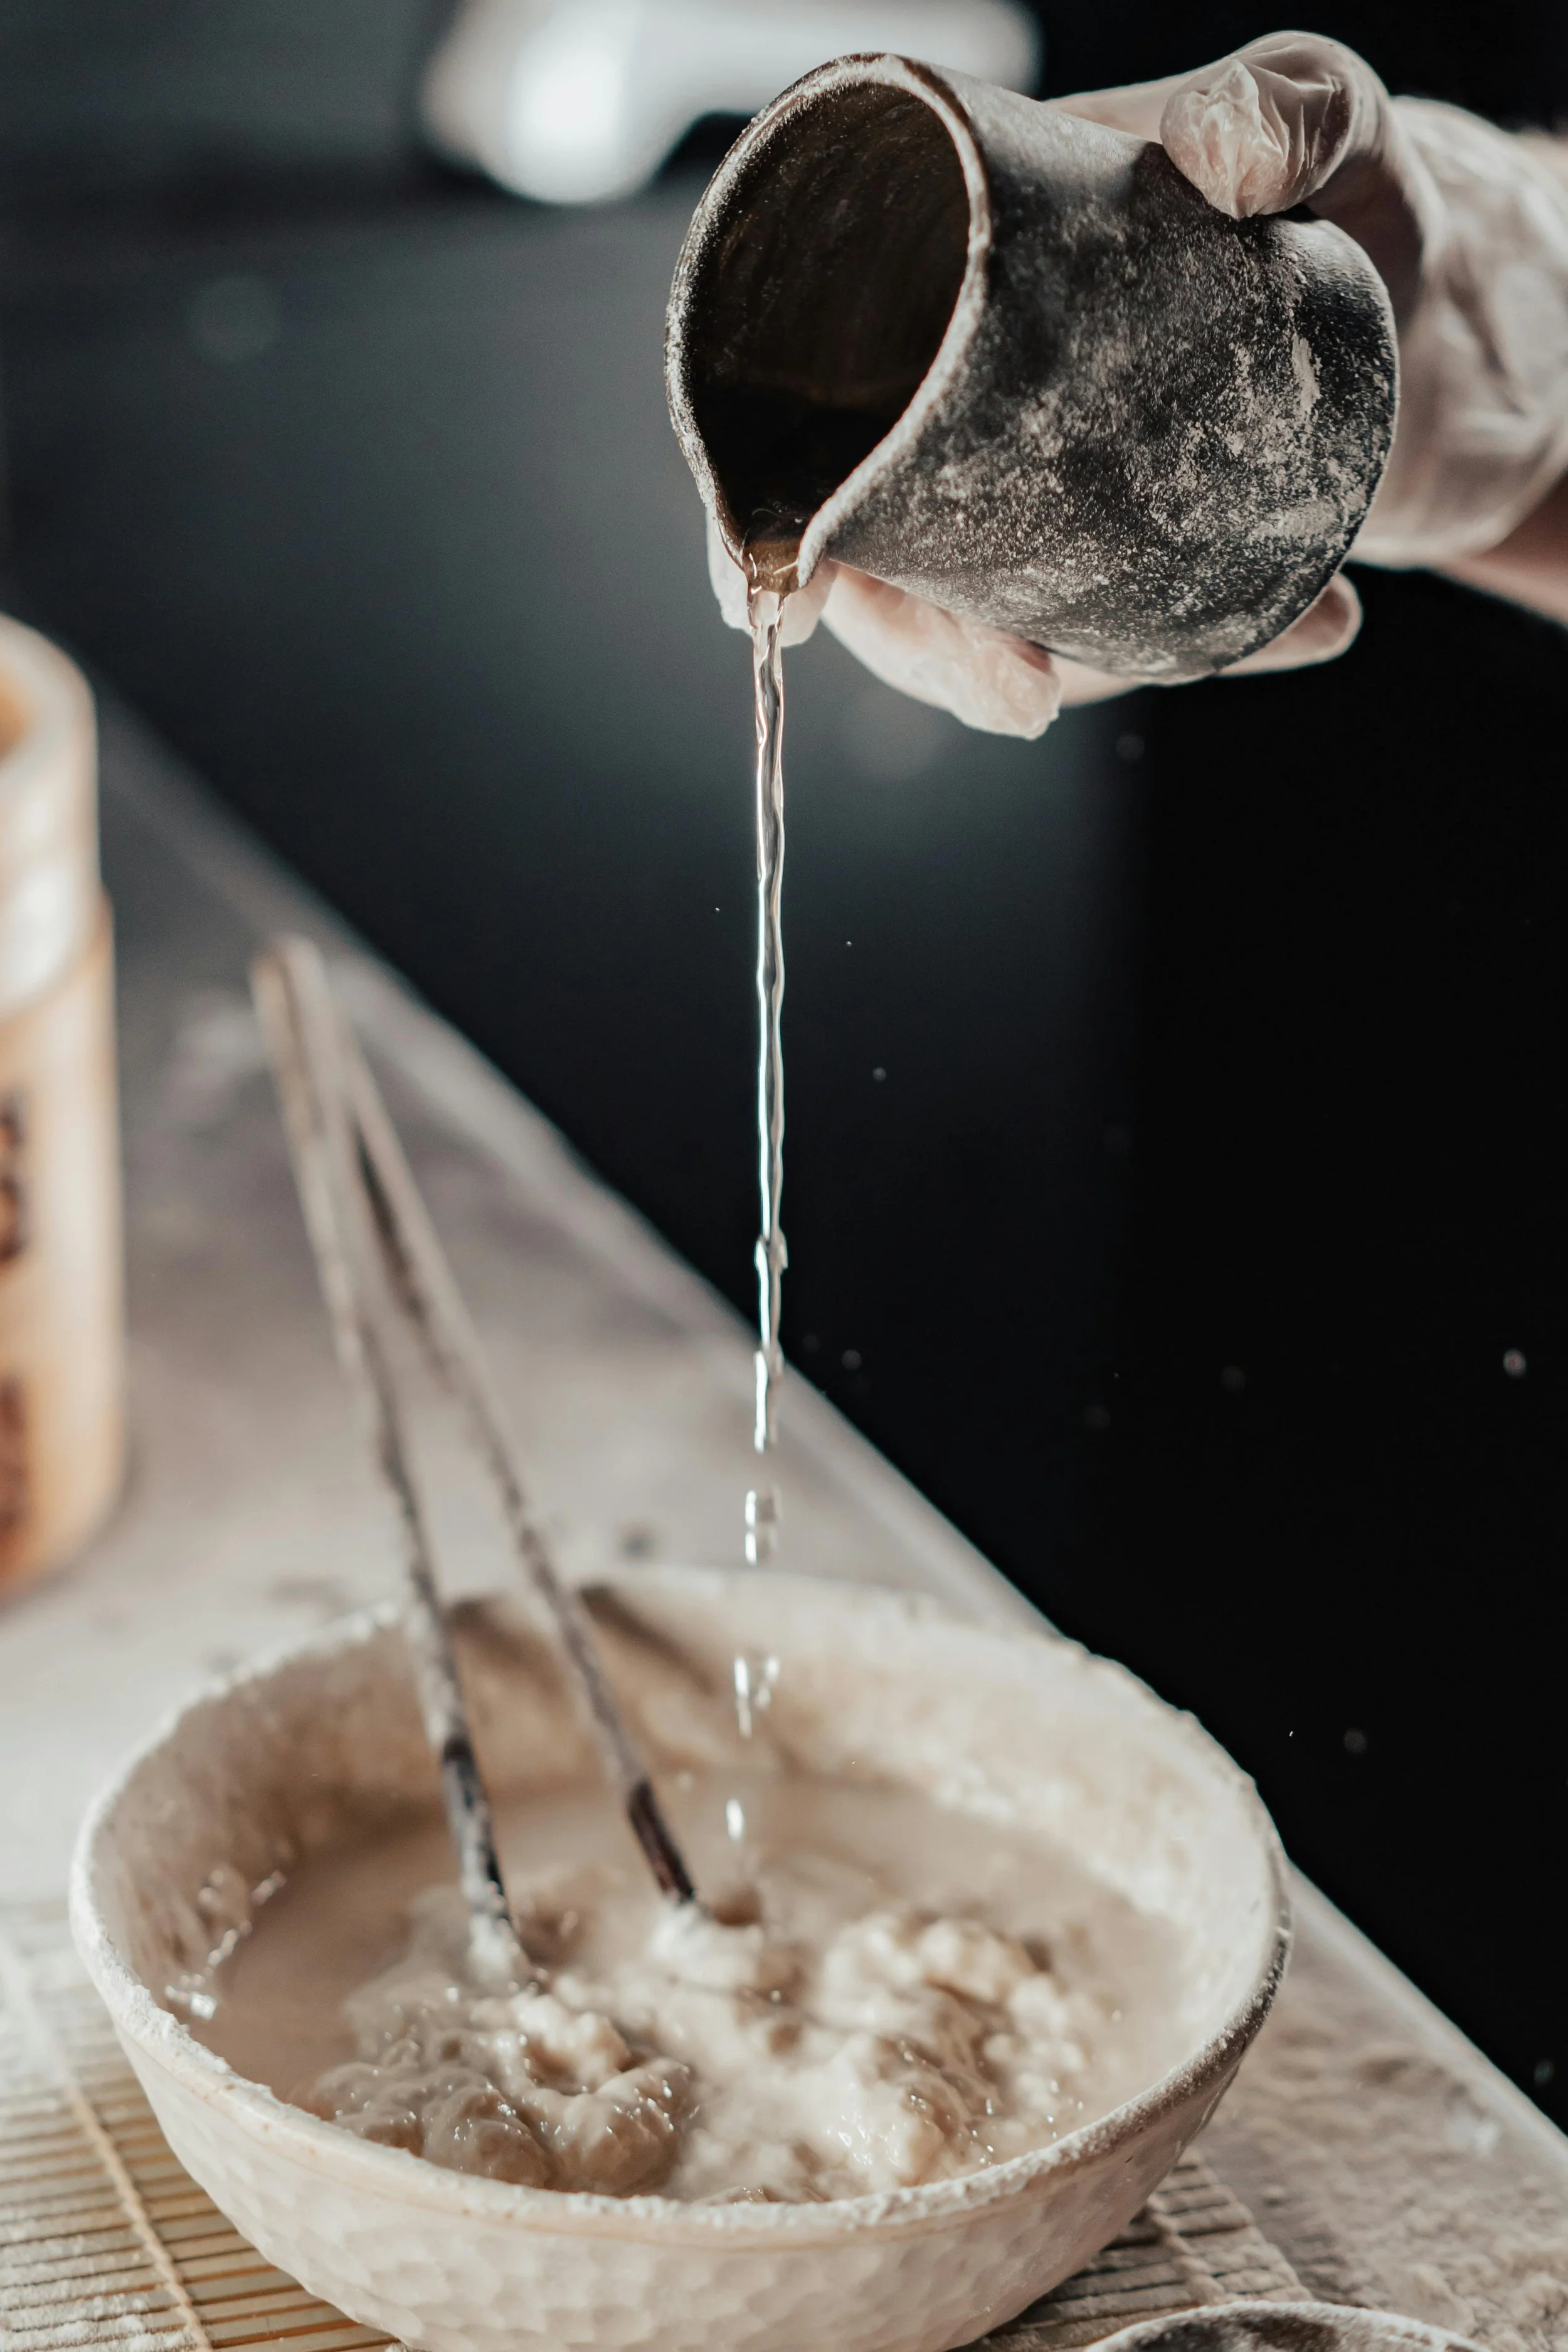
Filtered Water: The quality of your water is just as crucial as the flour you use. Chlorine in tap water can inhibit the natural fermentation process, so using filtered or dechlorinated water is crucial to ensure the best results. Warm water (not too hot, around 70°F or 21°C) is ideal for mixing your starter, helping activate the wild yeasts in the flour.
Best Spatulas for Mixing: A silicone spatula is perfect for stirring and mixing your starter because it’s easy to clean and won’t absorb bacteria.
A Loose-Fitting Lid or Tea Towel: Covering your sourdough starter with a breathable material is essential for allowing air exchange while keeping out dust or contaminants. A loose-fitting lid or a damp kitchen towel works well, as it lets the starter "breathe," allowing the wild yeasts to thrive and start the fermentation process.

Any spatula will work.
I prefer a spatula that is study, like the middle, or red spatial shown here, once I have a decent sourdough going. But for the beginning stages, the small spatula works great!
7-Day Sourdough Starter Schedule
Below is a detailed day-by-day guide to help you successfully grow your sourdough starter. Each day includes actions, ingredients, and what you can expect to see and smell. This schedule will also be available in a free PDF for easy reference!
Day 1: Starting Your Starter
Action & Ingredients:
First things first—begin your sourdough journey by mixing 1 cup of flour with 1 cup of filtered water.
Use a wooden spoon or spatula to stir the mixture until it’s well combined, creating a thick, sticky consistency. The texture should resemble pancake batter. Once mixed, transfer the dough into a clean jar or container.
Cover the jar loosely with a cloth or lid to allow airflow while preventing contaminants from getting in. To help keep track of your starter’s progress, you can place a rubber band around the jar at the level of the mixture to see how much it rises as fermentation progresses.
What to Expect:
On Day 1, your mixture will be thick and won't show bubbles yet—this is entirely normal! The wild yeast and bacteria in your environment have just started to get to work. At this point, there won’t be any noticeable activity, and the mixture may even look the same as when you first mixed it. The first time you see bubbles or notice a change in the consistency, you’ll know the fermentation process has begun in earnest. Don’t be discouraged if nothing seems to be happening just yet—it’s all part of the natural rhythm as the yeast and bacteria settle in and start to do their thing!
Day 2: Wake Up Your Starter
Action and Ingredients:
To get your starter moving
add another 1 cup of flour
1 cup of filtered water.
Stir until everything is evenly mixed.
Cover it loosely to allow the starter to breathe.
What to Expect:
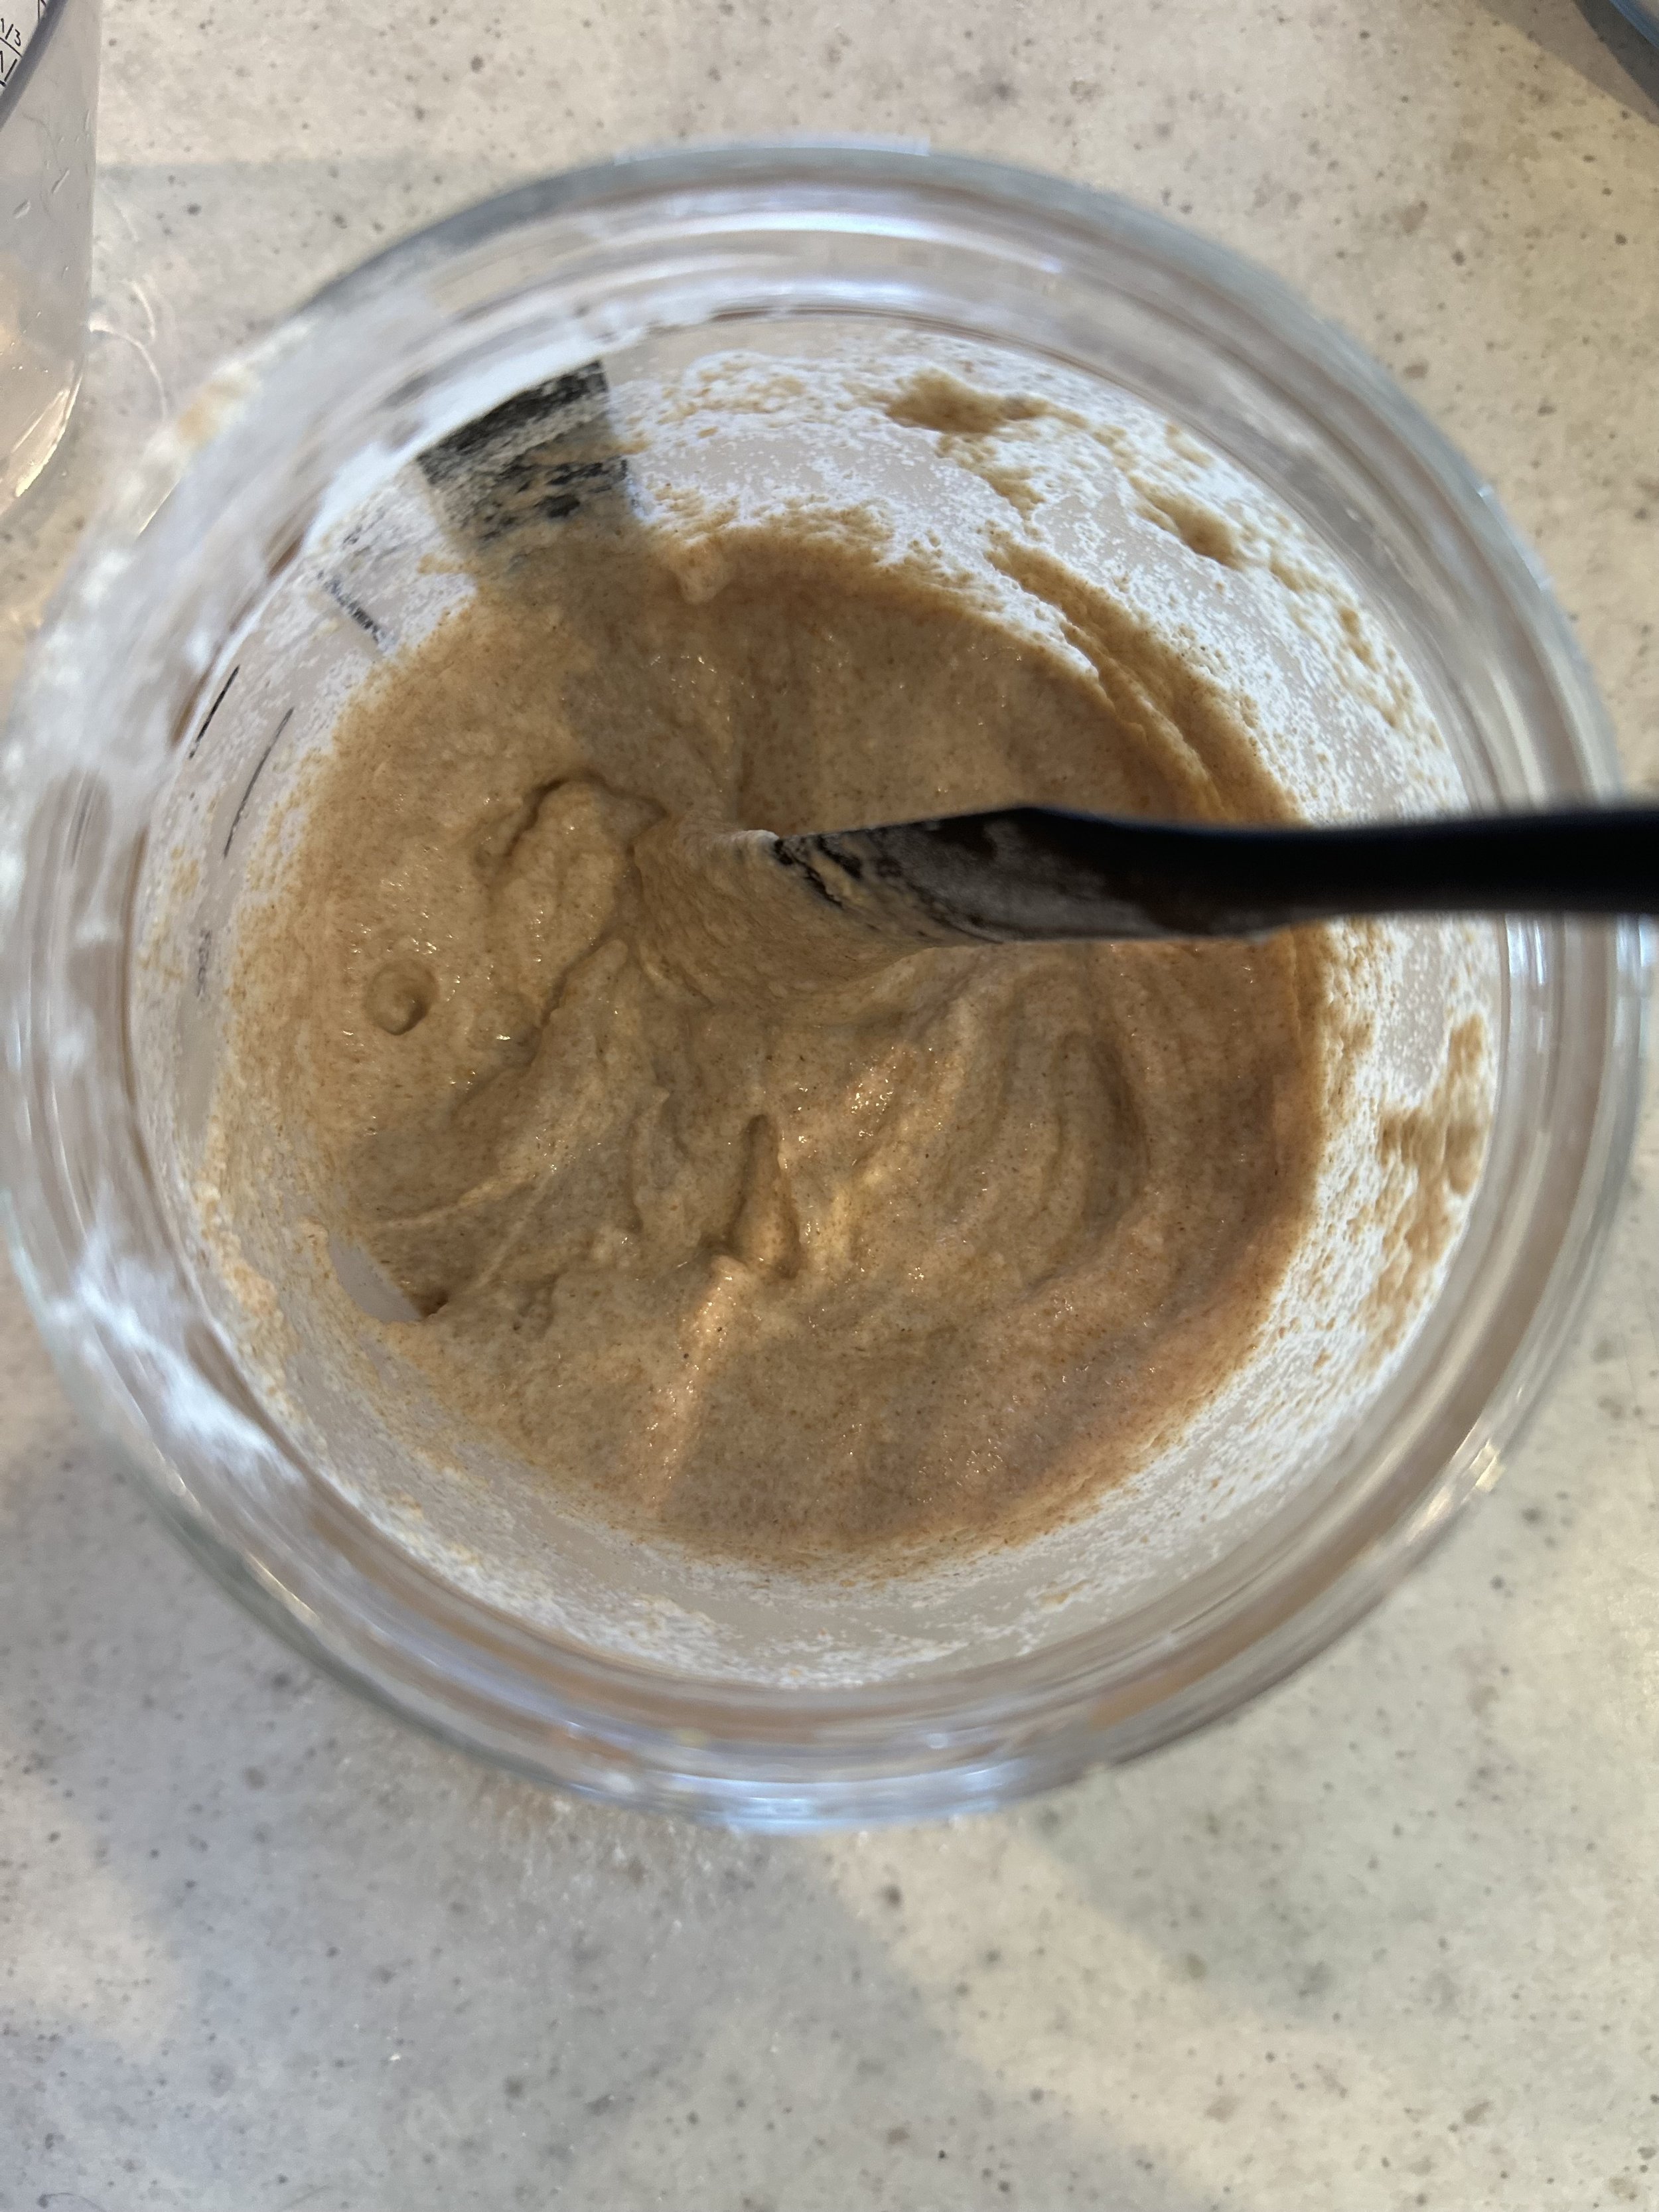
On Day 2, you’ll likely start seeing tiny bubbles beginning to form in the mixture. This is an early sign that the wild yeast is waking up and starting to ferment. There might also be a faint yeasty, slightly tangy aroma. This smell is a good sign, but it shouldn't be too overpowering or unpleasant. The consistency of the starter will still be thick, but these small bubbles and the faint smell show that the fermentation process is slowly gaining momentum.
Day 3: First Feeding & Discard
Action & Ingredients:
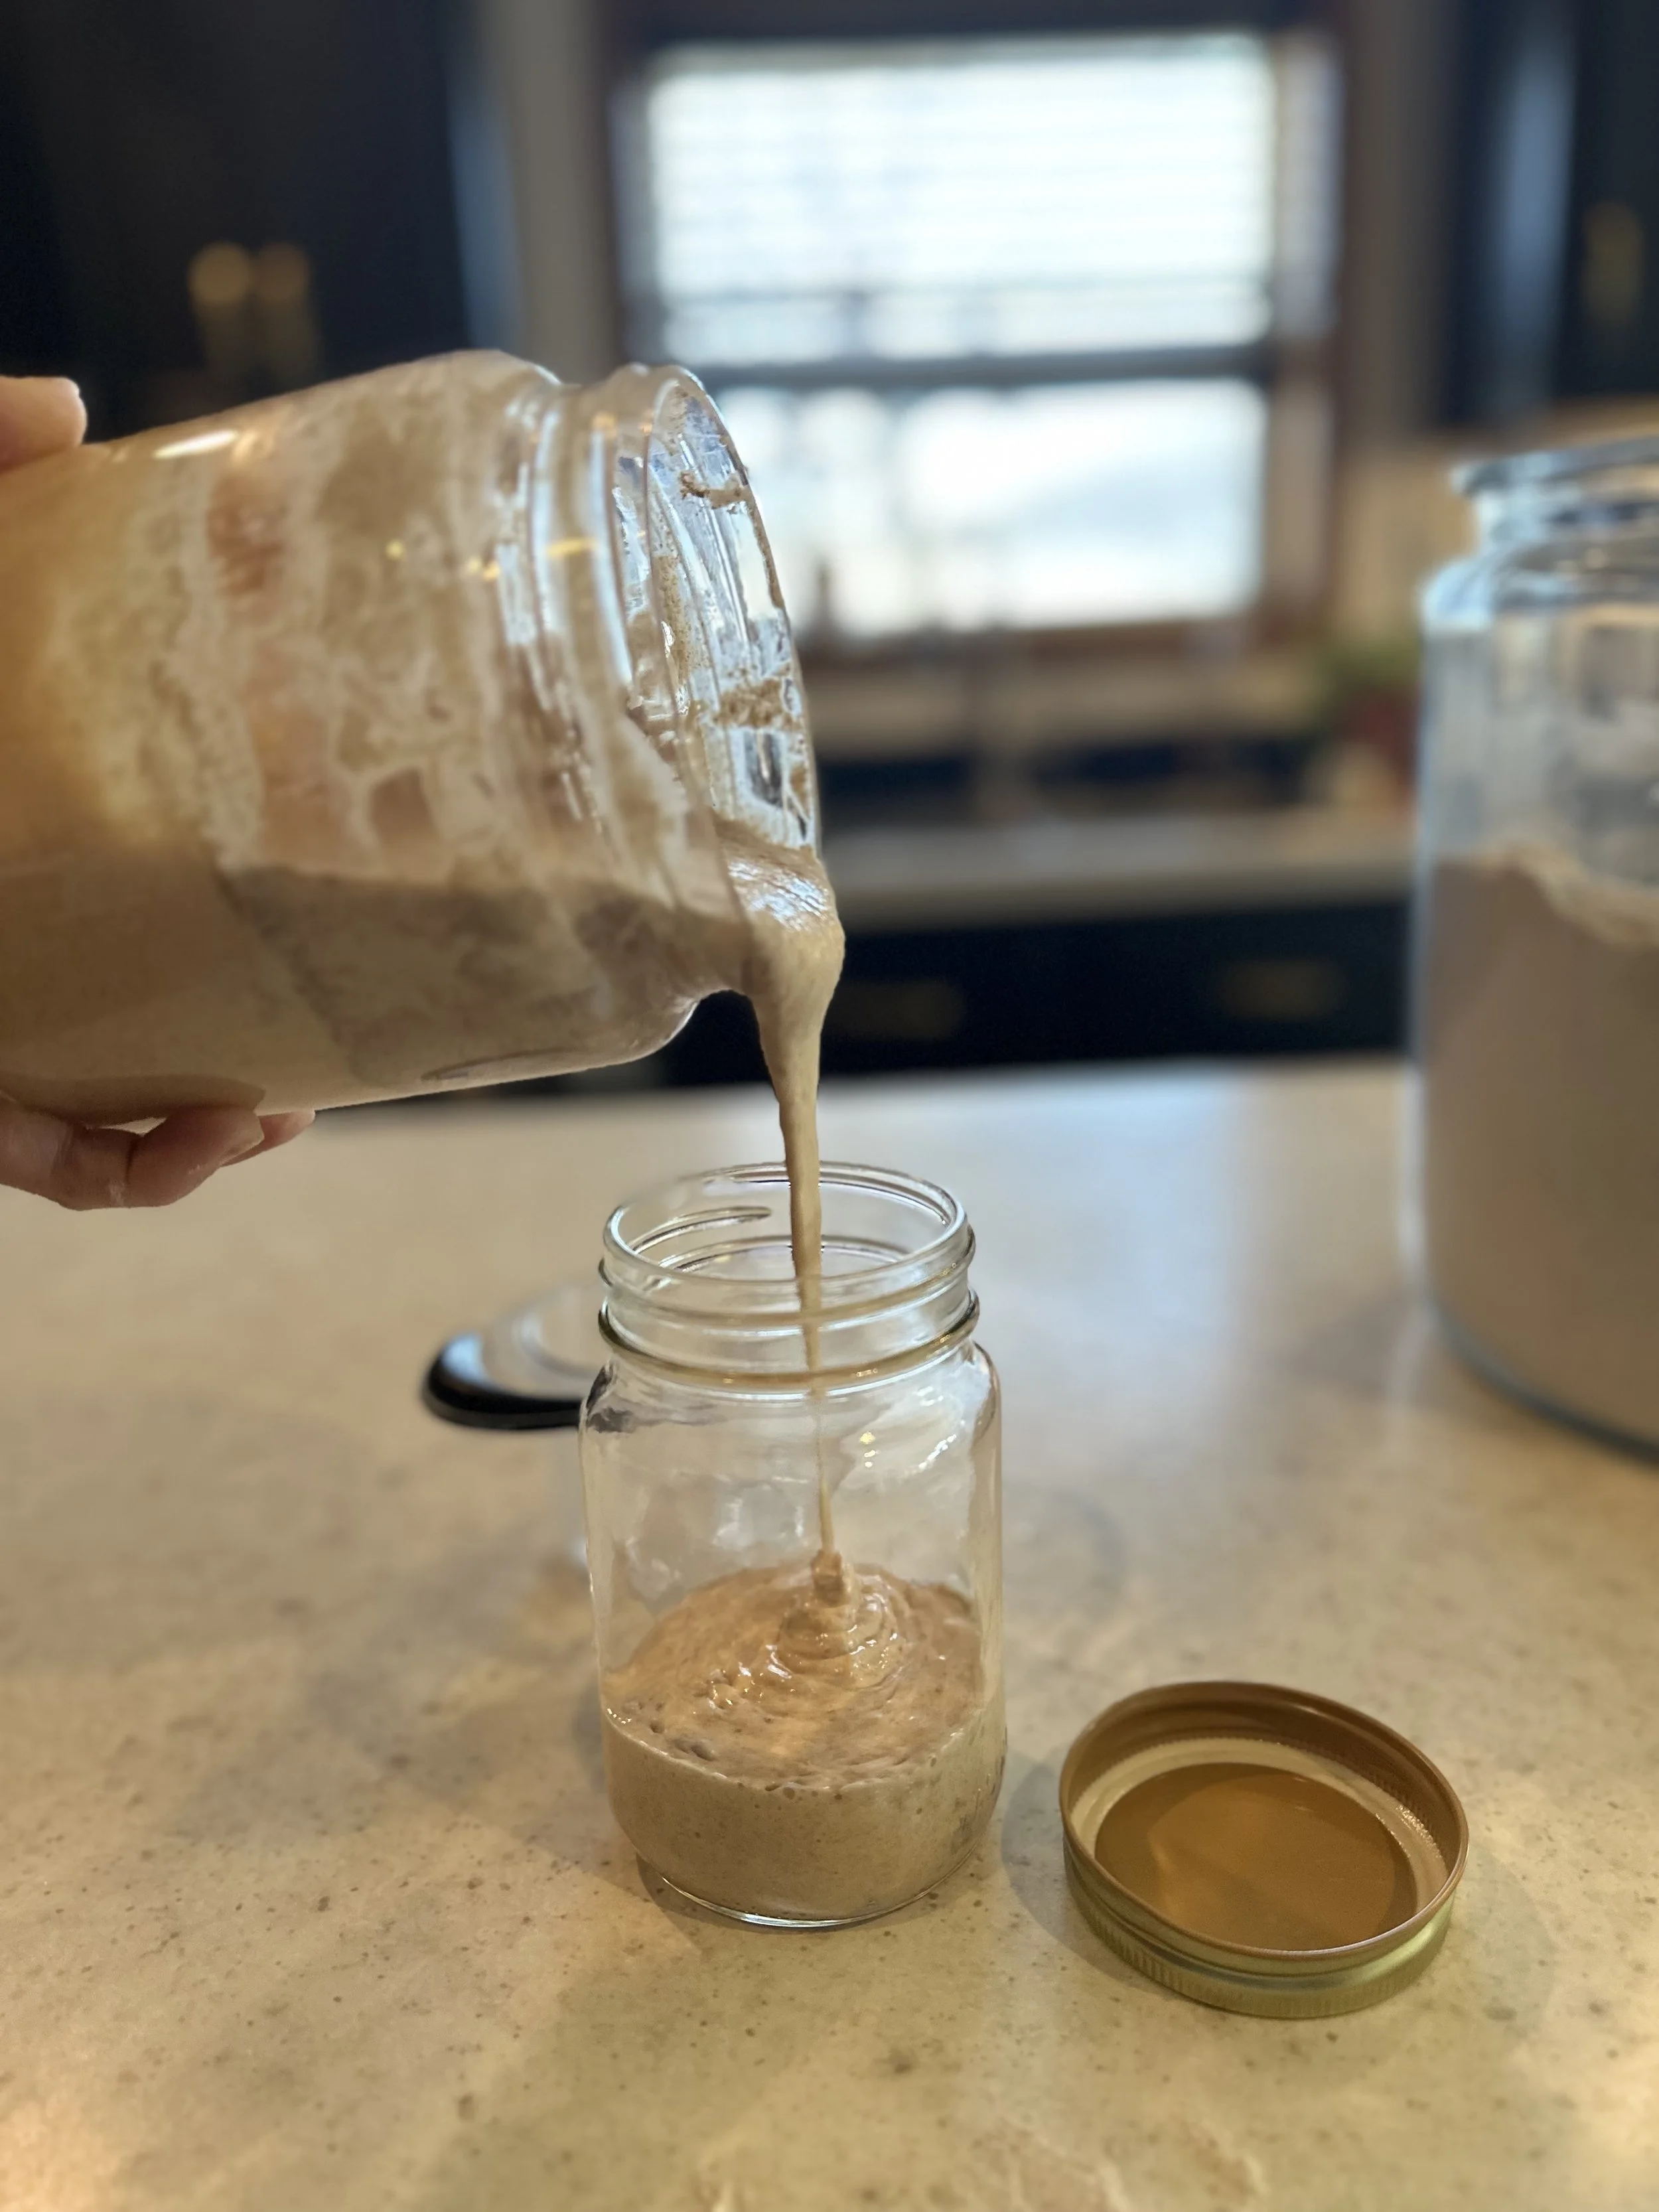
Discard half of your starter to maintain a healthy balance of yeast and bacteria. This step may feel like waste, but it's essential for managing the growth of your starter and promoting strong fermentation.
After discarding, add 1 cup of flour
1 cup of filtered water.
Stir until the mixture is smooth and well combined.
Cover loosely with a cloth or lid.
What to Expect:
By Day 3, you should notice a significant increase in bubbles, and your starter may begin to rise slightly after feeding. You’ll also smell a more distinct tang, indicating that the fermentation process is progressing. The starter will still be thick, but it will show more life with an increase in bubbles. This is an exciting moment, as it means the wild yeasts are establishing themselves, making your starter stronger and more active.
Day 4: Keeping It Going
Action & Ingredients:
Discard half of your starter again
refeed with 1 cup of flour
1 cup of filtered water
Stir thoroughly until you achieve a smooth consistency.
Cover loosely to maintain airflow.
What to Expect:
On Day 4, your starter should be showing even more signs of life. After feeding, it may double in size within 4-6 hours, which is a great indicator that the wild yeast is becoming more active. You’ll also notice more bubbles, foam on the surface, and a stronger, tangier smell as the lactic acid begins to develop. The starter will begin to loosen up, becoming less thick and more fluid. These are all positive signs that the fermentation process is progressing well.

Day 5 (Morning): The Starter is Gaining Strength
Action & Ingredients:
Discard half of your starter
Refeed with 1 cup of flour
1 cup of filtered water
Stir until smooth.
Cover loosely.
What to Expect:
By Day 5, your starter should be rising and falling predictably. After each feeding, it should double in size and then return to its original size, showing a reliable fermentation rhythm. The bubbles will be more visible, and the smell will be distinctly sour and tangy. The consistency will be looser than before, and the starter should stretch slightly when stirred. This consistency and predictable rise indicate that your starter is now healthy and thriving, ready to be used in sourdough recipes.
Day 5 (Evening): Strengthening the Culture
Action & Ingredients:
Discard half of your starter
Refeed with 1 cup of flour
1 cup of filtered water
Stir until smooth.
Cover loosely.
What to Expect:
At this point, your starter is becoming much stronger and more active. The wild yeasts are thriving, and your starter should show large bubbles and rise more quickly after feeding. The aroma will be more pronounced, and you’ll notice a pleasant tangy smell, indicating that the culture of wild yeast and bacteria has found a healthy balance. It’s an exciting stage—your starter is well on its way to being fully matured!
Day 6 (Morning): Full of Life
Action & Ingredients:
Discard half of your starter
Refeed with 1 cup of flour
1 cup of filtered water
Stir thoroughly to combine
Cover loosely.
What to Expect:
Your starter should now be full of bubbles, with visible bubbles throughout the mixture. After feeding, it should double in size within 4-6 hours, a clear sign that the yeast is thriving. The starter will look lighter and fluffier compared to earlier days, and the smell will be tangy, with a hint of fermentation. The consistency will be much looser than Day 1, and when stirred, the starter should stretch due to the increased gluten development. This is a sign that your starter is getting stronger and healthier.
Day 6 (Evening): Ready for Action
Action & Ingredients:
Discard half of your stater
Refeed with 1 cup of flour
1 cup of filtered water.
Stir well until smooth.
Cover loosely.
What to Expect:
Your starter is now fully active, and you should see significant fermentation activity. It should double within 4-6 hours after feeding, with large bubbles and a noticeable rise. The smell will have a more pronounced sour aroma as the wild yeast and bacteria reach a balanced culture. The starter will have a stretchy consistency, and it will be ready for baking soon.

Day 7: Ready to Bake!
Action & Ingredients:
On Day 7, it's time to see all your hard work pay off!
Discard half of your starter
Refeed it with 1 cup of flour
1 cup of filtered water.
Stir well to combine, making sure to incorporate all the flour.
Cover loosely with a lid or cloth to allow air circulation while the yeast and bacteria continue to thrive.
What to Expect:
By Day 7, your starter should be showing clear signs of readiness. It should be doubling in size consistently within 4-6 hours after feeding, which is a good indicator that it is healthy, active, and fully mature. The consistency will be bubbly, stretchy, and slightly elastic, with visible air pockets. The aroma will have a tangy, slightly vinegary scent, which signals that the fermentation process has progressed perfectly.
This is the best time to begin baking!
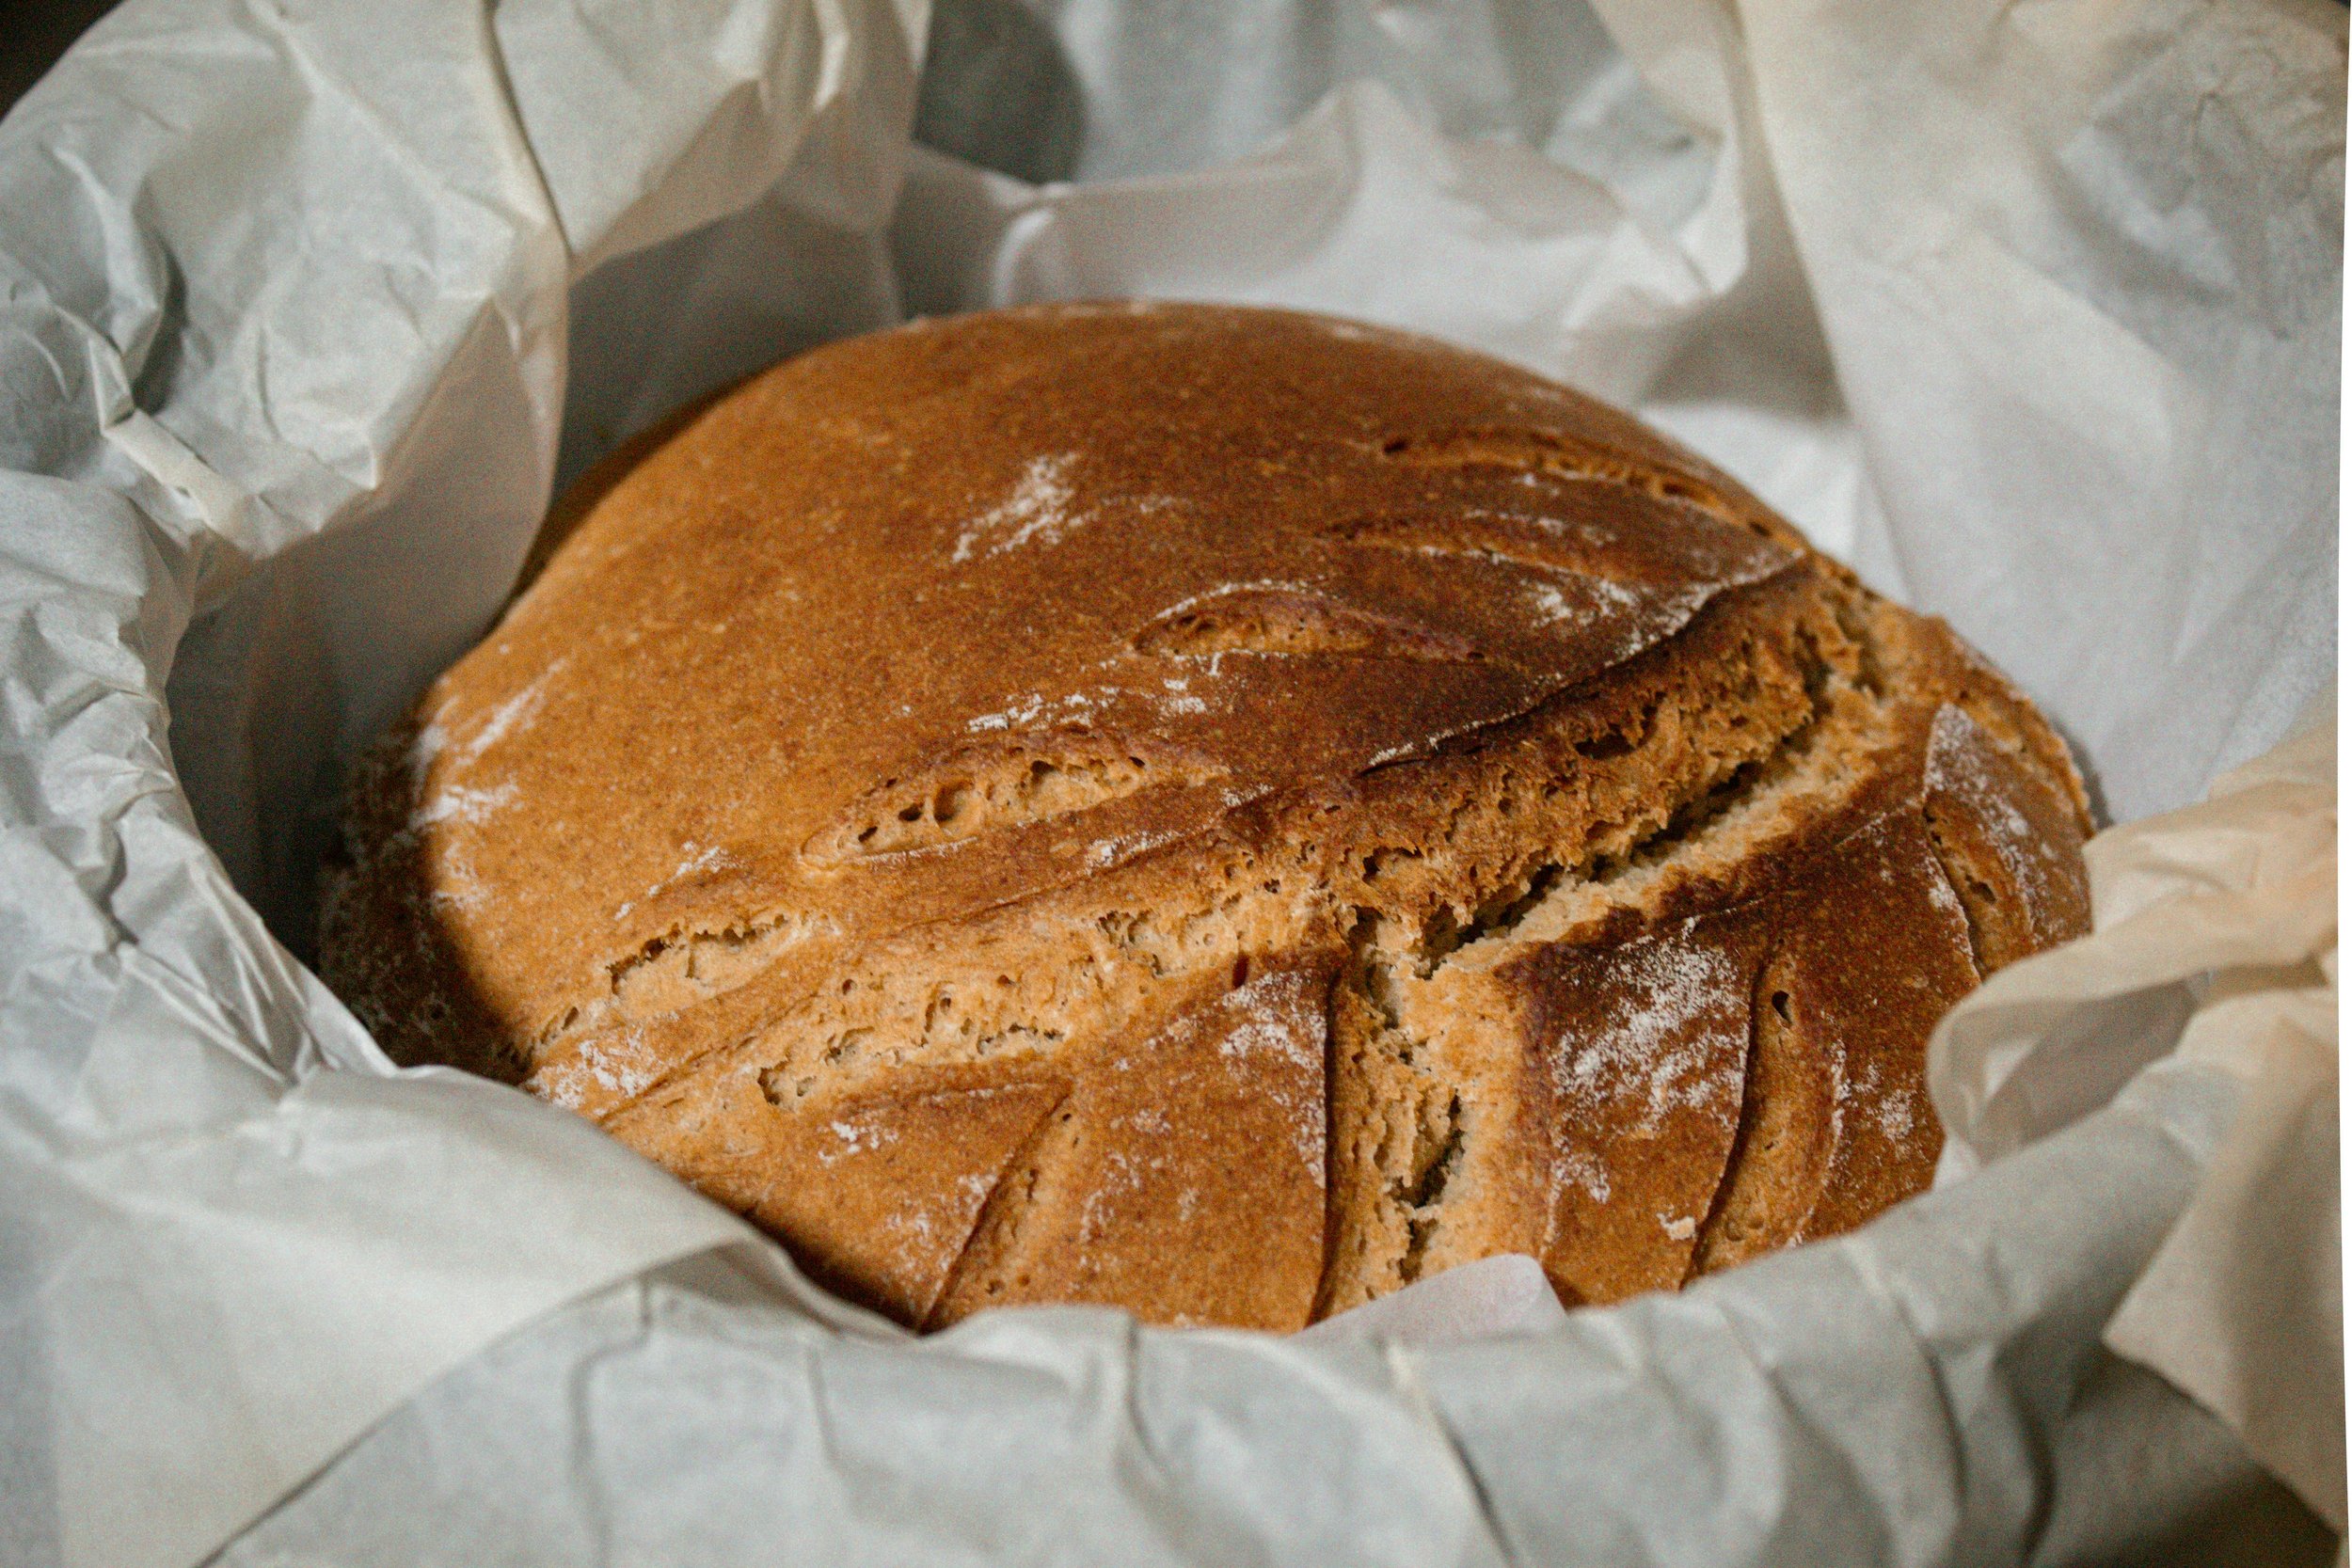
Your sourdough starter has developed enough strength and activity to create a beautiful loaf. It’s ready to be used in your favorite sourdough recipe for that perfect rise and a delicious tangy flavor.
Congratulations on reaching this milestone! You’ve now mastered the art of growing a strong and vibrant starter. Your sourdough bread journey is about to get even more exciting as you move on to the next step—shaping and baking your first perfect sourdough loaf!


This schedule will help guide you through every step, day by day, to ensure your sourdough starter is healthy, active, and ready for baking. Remember, the key is patience and consistency—your starter will tell you what it needs along the way! Don’t forget to download the free PDF version of this schedule to keep it handy. Happy baking!

Where to Keep Your Starter?
Your sourdough starter thrives best in a warm, stable environment, ideally between 75-80°F (24-27°C). Finding the best time to care for it, and ensuring it’s placed in the right spot, can make a world of difference. Here are some great spots to encourage healthy fermentation:
Near the stovetop (but not directly on it)
Inside the oven with the light on
On top of the refrigerator
In a proofing box (if you have one)
A warm pantry or cupboard
If you want to cover it, use a tea towel to loosely cover your starter and allow it to breathe, without trapping too much heat.
Avoid placing your starter in direct sunlight or near drafts, as fluctuating temperatures can slow down the fermentation process and prevent your wild yeast from becoming active. Finding a warm spot is key to the hardest part of sourdough: getting your starter going strong!
How Your Starter Comes to Life, the Magic of Wild Yeast
A sourdough starter is more than just flour and water—it’s a living, thriving culture that transforms simple ingredients into something powerful. It may seem like magic when bubbles appear and the mixture comes to life, but it’s all thanks to wild yeast and beneficial bacteria. Understanding this natural process will not only boost your confidence but also help you appreciate why sourdough is healthier than conventional bread.
Meet the Key Players: Yeast, Bacteria & Natural Sugars
When you mix flour and water, you're igniting a fascinating natural fermentation process. This process is powered by three key players that work together to create your sourdough starter:
Wild Yeast – Unlike commercial yeast, which is isolated and highly processed, wild yeast is naturally present in the air, on flour, and even on your hands. It thrives on the unrefined natural sugars in the flour, feeding on them and producing carbon dioxide. This gas creates the bubbles that make your sourdough rise. The wild yeast works its magic during the first rise, contributing to the slow fermentation process that gives sourdough its distinctive flavor and texture.
Lactic Acid Bacteria – These beneficial bacteria work hand-in-hand with wild yeast, contributing to both the flavor and health benefits of sourdough. Lactic acid bacteria are responsible for producing the signature tangy flavor of sourdough, which develops as they digest the sugars in the flour. Additionally, these bacteria help break down hard-to-digest compounds, such as gluten and phytic acid, improving the digestibility of your sourdough bread and enhancing nutrient absorption.
Unrefined Natural Sugars – The natural sugars in flour are complex carbohydrates that break down slowly during the fermentation process. Unlike refined sugars found in commercial bread, these unrefined sugars provide a steady source of energy without causing rapid spikes in blood sugar levels. The gradual breakdown of these sugars by wild yeast and bacteria results in a slow, sustained release of energy. This makes sourdough bread a healthier alternative to conventional bread, and the warm spot where your starter is kept helps foster optimal conditions for the fermentation process.
Why Wild Yeast & Natural Sugars Are Better for You
The fermentation process in sourdough bread significantly alters how your body interacts with the carbohydrates in flour. Unlike many commercial breads, which cause a rapid spike in blood sugar, sourdough's wild yeast and beneficial lactic acid bacteria work together to slow digestion and help stabilize blood sugar levels. These natural microorganisms break down gluten and phytic acid, which can inhibit nutrient absorption. As a result, sourdough bread offers better nutritional value and is gentler on the digestive system compared to conventional bread.
How Fermentation Transforms Bread & Benefits Digestion
Many people experience bloating or discomfort after eating conventional bread, but sourdough is often much easier on the digestive system. Here’s why:
Breaks Down Gluten – The long fermentation process in sourdough bread allows the wild yeast and lactic acid bacteria to partially pre-digest the gluten. This makes sourdough bread easier to tolerate for those with mild gluten sensitivities. While sourdough is not gluten-free, many people find it less irritating than typical commercial bread, as the extended fermentation helps break down gluten and makes it more digestible.
Lowers Phytic Acid – Phytic acid, known as an "anti-nutrient," is present in grains and can interfere with the absorption of essential minerals like iron, zinc, and magnesium. The bacteria in sourdough actively break down phytic acid, allowing your body to absorb these critical nutrients more efficiently, which is a significant benefit over conventional bread.
Supports Gut Health –The beneficial bacteria in sourdough starter help create a prebiotic-rich environment in your gut. This environment feeds the healthy bacteria that support proper digestion and overall gut health, contributing to a well-balanced microbiome and potentially improving digestive comfort.
Regulates Blood Sugar – Since sourdough fermentation slows the breakdown of carbohydrates, it leads to a gradual rise in blood sugar levels compared to standard white bread. The slower digestion of the complex carbohydrates in sourdough helps maintain more stable blood sugar levels, making it a better option for those managing blood sugar spikes.
What You’ll See: A Day-by-Day Look at Fermentation
As you feed your sourdough starter each day, the wild yeast and beneficial bacteria will continue to grow and transform the mixture. Here’s what to expect:
Day 1-2: The mixture will appear thick and quiet, but don’t worry—yeast and bacteria are starting to wake up and prepare for the fermentation process.
Day 3-4: Small bubbles will begin to form, and a slightly tangy or fruity smell will emerge. This indicates that fermentation is in full swing.
Day 5-7: The starter will be rising and doubling in size after each feeding. The aroma will become stronger, signaling that your starter is now alive and active, ready for ba
Keeping Your Starter Healthy & Thriving (Even When Life Gets in the Way)
Caring for a sourdough starter may seem like a strict routine, but the truth is—there’s plenty of room for flexibility! Unlike commercial yeast, which requires precise conditions to work, wild yeast and lactic acid bacteria are resilient. If you miss a feeding or two, don’t worry—your starter can almost always bounce back. ( Speaking from experience.)
Missed a Feeding? No Problem!
Life happens, and sometimes you might forget to feed your starter on time. The good news is that your sourdough culture is incredibly forgiving. Here’s what to expect if you miss a feeding:
A Few Hours Late? No worries! The yeast and bacteria in your starter are still happily fermenting. Just resume feeding as soon as you remember.
Missed a Day or Two? Your starter may get sluggish, develop a stronger tangy or sour aroma, or even form a layer of liquid on top called "hooch." This is a sign that the yeast is hungry. Simply stir the hooch back in or pour it off, discard half of the starter, and feed it with flour and water. It may take a couple of feedings to regain its full strength, but it will recover.
Forgotten for a Week? If your starter has been neglected for a week, it may develop a darker hooch and a stronger aroma. While it might look unappealing, it’s usually not ruined. Discard most of it, leaving about ½ cup behind—this "mother" will act as the base for a refreshed starter. Feed it as usual, and within a couple of days, it should be bubbling and ready for baking again!
The Seven-Day Process: It Doesn’t Have to Be Perfect
When starting your sourdough culture, consistency is key, but that doesn’t mean you have to be perfectly on time with every feeding. I’ll be honest—when I was first making my starter, there were times I fed it hours later than planned! And guess what? It still turned out great.
Your starter is a living system, but it’s not a fragile one. A few hours off schedule here and there won’t harm it. The key is simply to keep feeding it regularly and pay attention to the signs it gives you—bubbles, aroma, and activity.
Reviving a Neglected Starter

If your starter has been sitting untouched for weeks or months, it may need some extra care. Here’s how to bring it back:
Check for mold – If you see visible mold (fuzzy patches, unusual colors), it’s best to start over.
Discard heavily – Remove most of the starter, leaving just about ½ cup behind to work with.
Feed aggressively – Give it fresh flour and filtered water twice a day for a few days to wake it back up.
Watch for activity – Bubbles, a pleasant tangy smell, and rising levels indicate it's coming back to life!
Your sourdough starter is adaptable and will reward you with delicious bread, even if you make mistakes along the way. The more you work with it, the more you’ll learn to trust the process—and the more confidence you’ll have in keeping it strong.
So don’t stress over perfection. Just keep feeding, adjusting, and enjoying the sourdough journey. Before you know it, you’ll have a thriving starter ready to bake incredible sourdough bread!
Troubleshooting Your Starter: When Things Don’t Go as Planned
If your sourdough starter isn’t behaving the way you expected, don’t panic! Sourdough is a living, evolving process, and sometimes, things don’t go exactly as planned. The good news? Most issues have simple fixes. Below, we’ll explore common problems, what might be causing them, and multiple ways to get your starter back on track.

No Bubbles? No Growth?
Your starter looks flat and lifeless—no bubbles, no rise. It’s like nothing is happening.
Possible Causes & Fixes:
✅ Room Temperature is Too Cold – Yeast and bacteria thrive between 75-80°F (24-27°C). If your kitchen is chilly:
Move your active starter to a warmer spot, like on top of the fridge or near a warm appliance.
Wrap it in a towel or place it in the oven with the light on (but don’t turn the oven on!).
Use warm (not hot) water when feeding to give it a little boost.
✅ Flour Type Matters – Starters love whole-grain flours like whole wheat or rye because they contain more natural yeast and nutrients. If your starter is sluggish:
Try switching to whole wheat or rye flour for a few feedings to help jump-start fermentation.
If using all-purpose flour, make sure it’s unbleached—bleached flour can slow things down.
✅ Be Patient – In some cases, it just takes time. Some starters take up to 7-10 days to really get going. Keep feeding it consistently, and don’t give up too soon! Trust the process and know your starter will be ready for baking in the next day or so.
Hooch (Liquid) Forming on Top?
If you see a layer of liquid on top, sometimes grayish or brownish, this is called hooch. It’s totally normal and just means your starter is hungry!

What to Do:
✅ Stir It Back In – Hooch is harmless and contains some beneficial acids. Stirring it in maintains the starter’s hydration.
✅ Pour It Off – If your starter is getting too runny or overly tangy, pour off the hooch before feeding.
✅ Feed More Often – If you’re consistently seeing hooch, try feeding your active starter twice a day instead of once to keep it well-fed.
Mold: When to Start Over

Moldy sourdough starter
If you notice pink, orange, red, or fuzzy growth, that’s mold—unfortunately, that means it’s time to start over.
How to Prevent Mold:
✅ Use Clean Utensils & Jars – Always use a clean spoon and jar when feeding your starter. Contamination can encourage mold growth.
✅ Avoid Overly Warm & Humid Areas – While warmth helps yeast thrive, excessive humidity can encourage mold. Keep your jar covered with a breathable lid, like a loose cloth or coffee filter, instead of an airtight lid.
✅ Regular Feedings – If left unfed for too long, the balance of good bacteria and yeast can weaken, allowing unwanted bacteria to take over.
Smells Off? Strange Colors?
Sourdough starters can have a variety of smells, from tangy and yeasty to slightly fruity or even like nail polish remover. But some smells and colors indicate problems:
🚨 Strong Rotten or Putrid Smell? This could mean bad bacteria have taken over. It’s a good indicator that it’s best to start fresh with a new starting point.
🚨 Pink, Orange, or Red Streaks? These are signs of contamination—time to toss and restart your starter.
✅ Mild Vinegar or Alcohol Smell? This is normal and just means your starter is extra hungry. Feed it, and it should balance out once you place it in a warm place to ferment.
Forgot to Feed It? Left It Alone for Too Long?
Life happens! If you forget to feed your starter for a few days—or even a couple of weeks—it can still be saved.
How to Revive a Neglected Starter:
✅ If It’s Been 1-2 Days: Just feed as usual. It’ll bounce right back.
✅ If It’s Been a Week: It may need a couple of extra feedings before it becomes active again. You may also want to discard more than usual, keeping about ½ cup as your base.
✅ If It’s Been a Month (or Longer!): As long as there’s no mold, you can still revive it! Discard all but a small amount (about 1-2 tablespoons), then feed it twice a day for a few days to rebuild strength.

Naming Your Sourdough Starter
As I mentioned, my sourdough starter is named Harvey, after my Grandpa Harvey. Naming your starter is a fun tradition in the sourdough community! Since it’s alive and needs regular care, it feels like a little kitchen pet. Here are some fun name ideas:
Yeasty Boy
Doughnald
Flourence
Bubbles
Bread Pitt
Stay tuned for my next post, where I’ll share a whole list of creative and fun sourdough starter names!
Final Thoughts
Congratulations on nurturing a thriving sourdough starter! You’re now ready to dive into the world of homemade sourdough bread, crafting everything from classic artisan loaves to fluffy sourdough dinner rolls and even sweet sourdough discard recipes. The process of building and maintaining a wild yeast starter connects you to a time-honored tradition, allowing you to create naturally leavened bread with incredible depth of flavor and texture.
But your sourdough journey doesn’t stop here! Now that you’ve mastered the basics, it’s time to experiment with different flour blends to develop unique flavors, fine-tune your fermentation techniques for the perfect crust and crumb, and even explore no-knead sourdough bread recipes for a more effortless approach. Interested in reducing waste? Discover creative ways to use sourdough discard in everything from pancakes to crackers.
If you’re looking to level up your baking skills, check out these helpful guides:
🔹 Easy Sourdough Bread Recipe (Without a Scale) – A beginner-friendly bread recipe using volume measurements.
🔹 10 Delicious Ways to Use Sourdough Discard – A roundup of creative ideas.
🔹 10 Easy sourdough recipes for beginners - A guide of recipes that will help you get on your feet.
🔹 The Science Behind Sourdough: Why It’s Different from Store-Bought Bread – A deep dive into fermentation.
Baking with sourdough is an ongoing learning experience, filled with trial, error, and rewarding success. Keep feeding your starter, experimenting with new techniques, and enjoying the delicious results. Happy baking, and may your sourdough adventure be as rich and fulfilling as the loaves you create!