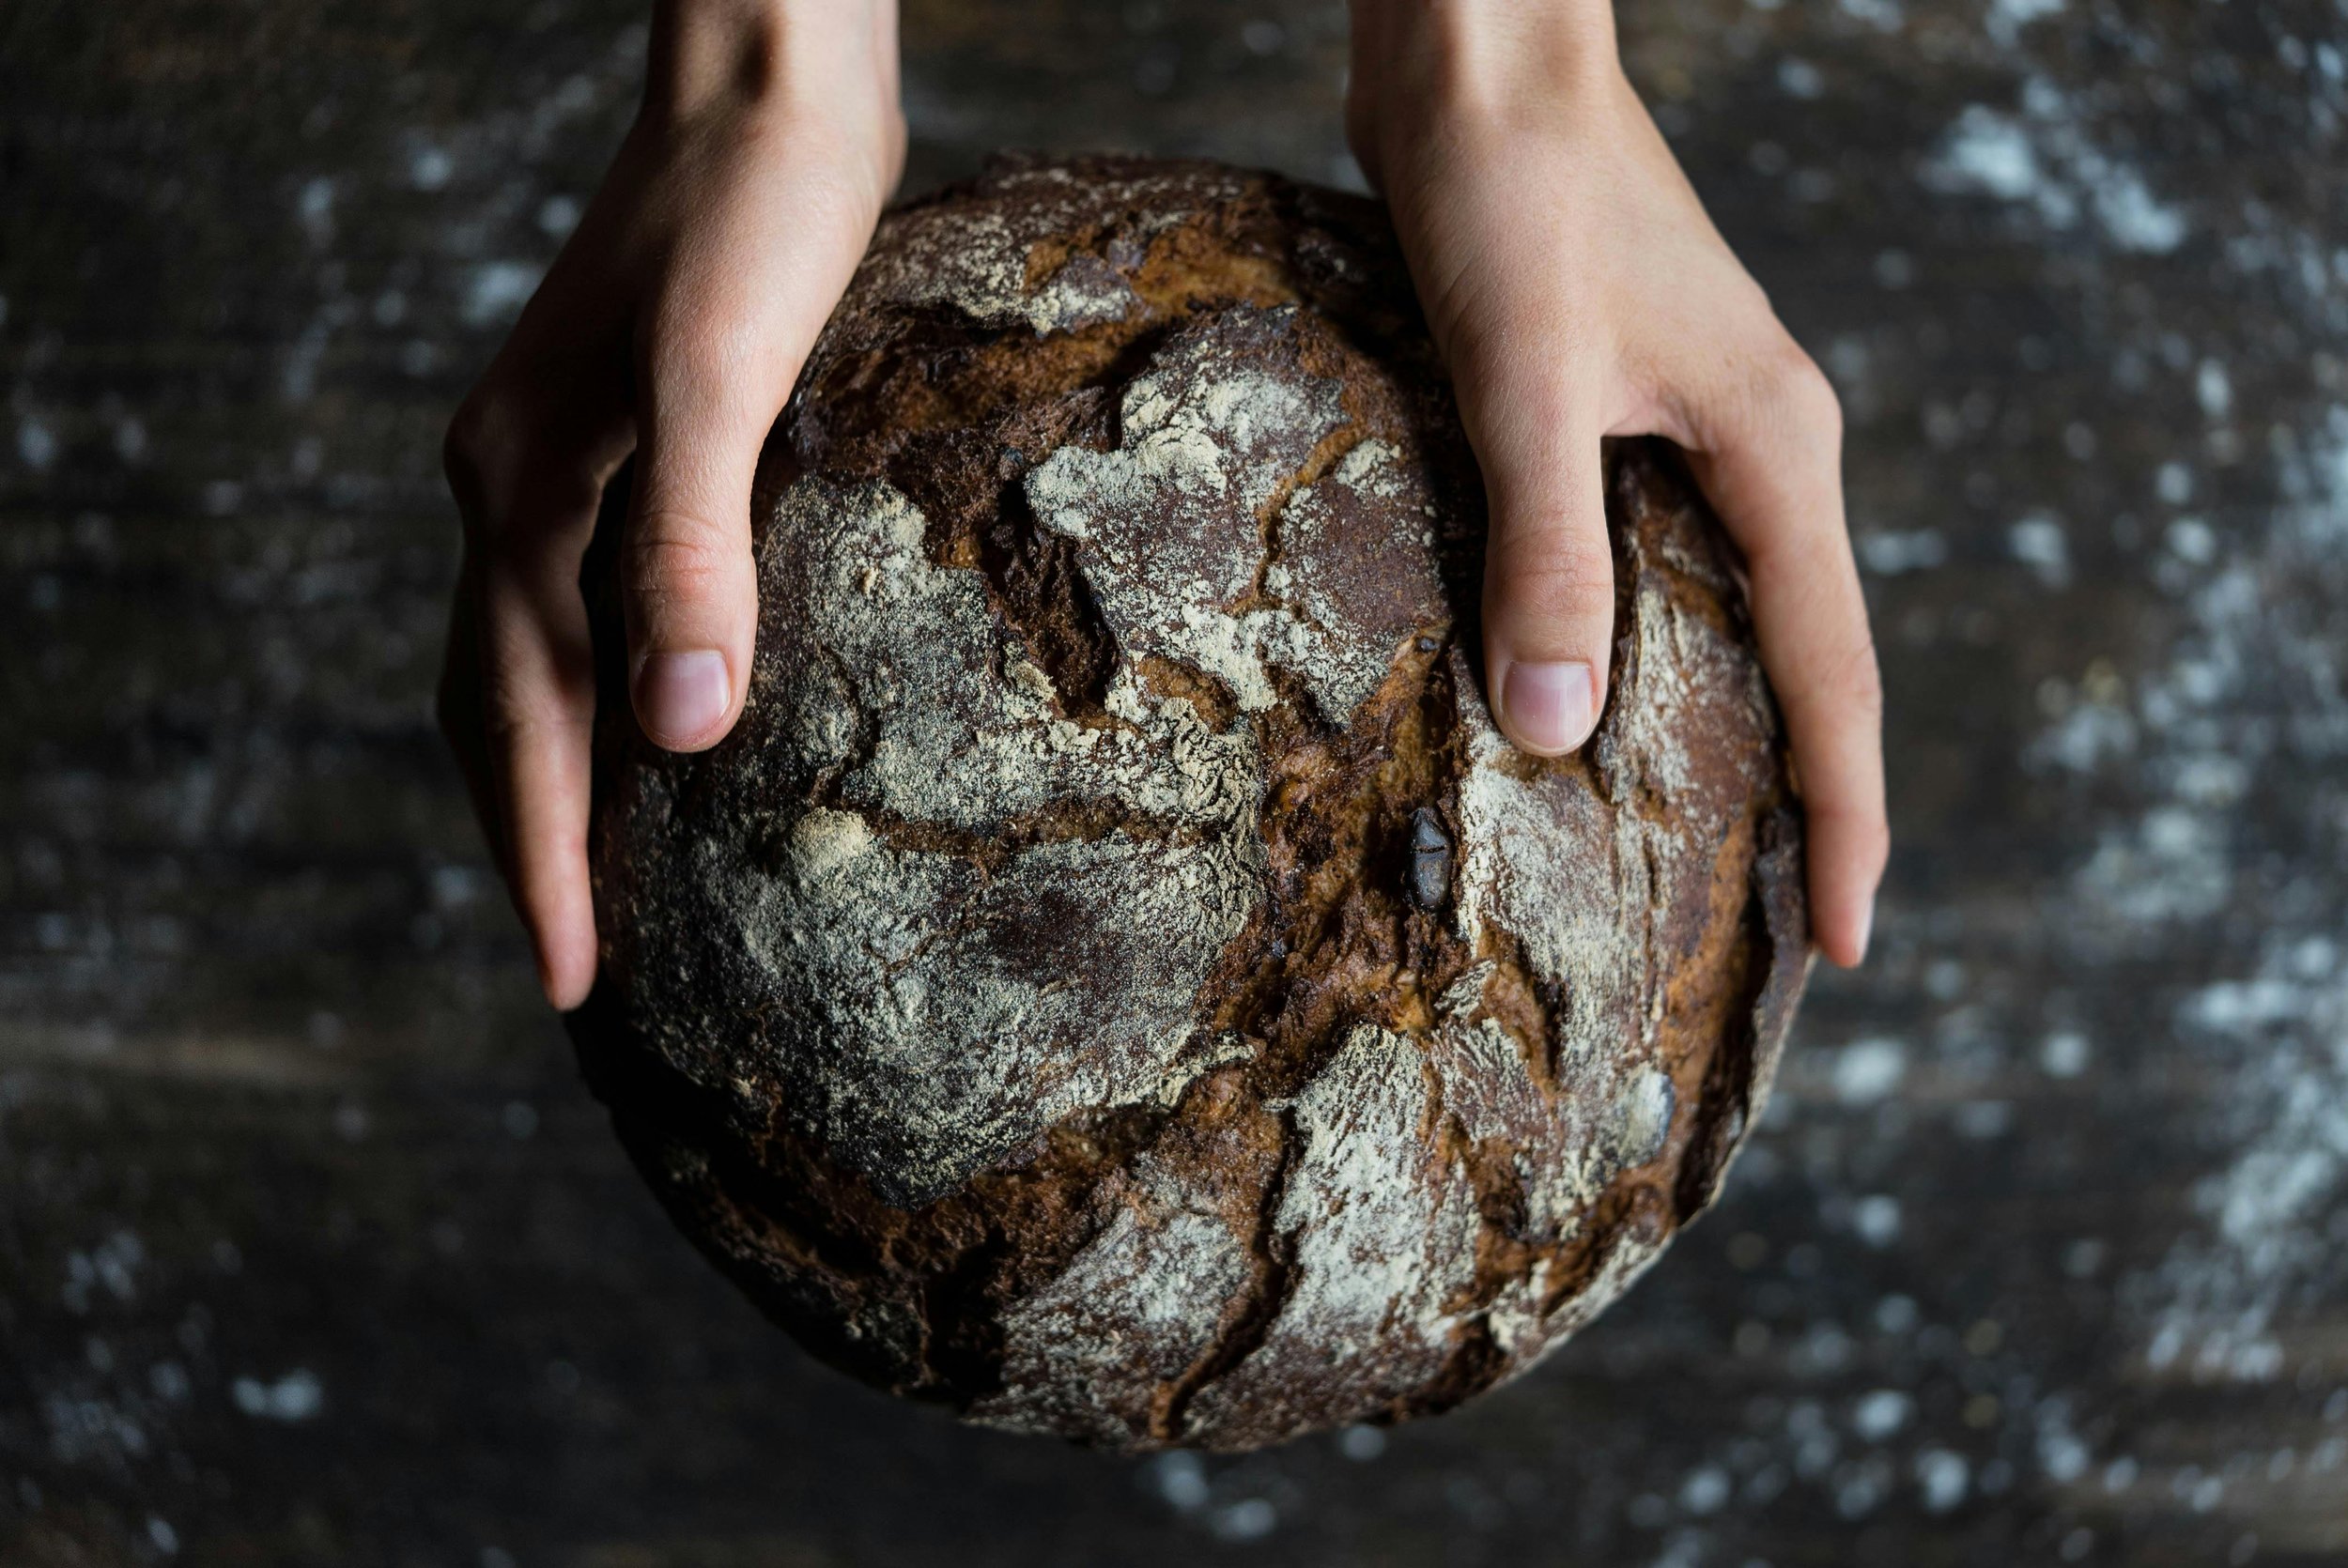
Easy Sourdough Bread Recipe (No Scale Needed)
Free sourdough schedule download, click here!
If you’ve just finished growing your own active sourdough starter, congratulations! That bubbly mixture of flour and water sitting on your countertop is alive and full of wild yeasts, just waiting to become your very first loaf of bread. And if you're like me when I first started, you're probably wondering, “Okay… now what?”
I remember my first time making sourdough like it was yesterday—standing in my kitchen with a large mixing bowl, flour all over the counter, and a confused look on my face as I tried to figure out what bulk fermentation even meant. My dough rise was a little sad, my crispy crust was more of a chewy mystery, and I used way too much starter because I didn’t yet understand how the fermentation process really worked.
But here's the good thing: every “flop” was also a step toward better bread.
From trying to keep my own sourdough starter alive in the middle of cold temperatures, to overthinking whether to use bread flour, all-purpose flour, or a mixture of flour, I’ve made nearly every beginner mistake there is. I’ve baked flat loaves, under-proofed ones, overly sticky ones (because I didn’t realize I needed to use wet hands or a bench scraper), and even had dough stuck to a plastic wrap cocoon for hours.
But you know what? That’s all part of the sourdough journey—and every baker has been there.
This easy sourdough bread recipe is designed especially for you: the first-time baker who just wants a simple, approachable method with step-by-step instructions. Whether you’re using a proofing basket, a loaf pan, or just a damp kitchen towel in a large bowl, you can make this work.
You don’t need a digital scale (though it helps), a fancy banneton basket, or even a stand mixer. With a few basics—like a sheet of parchment paper, a hot Dutch oven, and your hands—you’re ready to bake. This loaf will take some patience (most of it is just waiting), but by the next day, you’ll pull a beautifully golden, crusty, homemade sourdough loaf from your oven and think, “I actually made this!”
And if it doesn’t go perfectly the first time? That’s okay too. There’s always a next time, and trust me—it gets easier, more fun, and more delicious with every bake.
Let’s get into it—your first loaf of sourdough bread starts now.

Ingredients
100g (1/2 cup) active sourdough starter – bubbly and ready to go (do the float test if you’re unsure)
375g (1 1/2 cups + 1 tbsp) warm water – helps get the fermentation going
500g (4 cups) bread flour – or all-purpose flour if that’s what you have
10g (1 3/4 tsp) fine sea salt – for flavor and gluten strength
Tip: You can also use a mixture of flours (like adding a little whole wheat flour) for extra flavor and nutrients.
Tools
Large mixing bowl – for combining your dough
Dutch oven or baking vessel – essential for that beautiful crispy crust
Bench scraper – makes handling sticky dough much easier
Tea towel or damp kitchen towel – to cover your dough during resting and proofing
Parchment paper – helps transfer the dough without sticking
Proofing basket (banneton) or a bowl lined with a floured tea towel
Optional: Lame or a very sharp knife – for scoring the top of the dough before baking
Don’t have a Dutch oven? A deep loaf pan or even a heavy baking sheet with an inverted pot or metal bowl over the dough can work in a pinch.
Step 1: Mix the Dough (Autolyse)

Combine your ingredients and let the dough rest
In a large mixing bowl, stir together:
100g (1/2 cup) active sourdough starter
375g (1 1/2 cups + 1 tbsp) warm water
500g (4 cups) bread flour (or all-purpose flour)
Mix everything until no dry bits of flour remain. It’s okay to use your hands, a spoon, or a dough hook on a stand mixer if that’s more comfortable—but don’t overthink it. This part doesn’t have to be perfect!
Once mixed, cover the bowl with a damp tea towel, plastic wrap, or even a plastic bag to prevent the dough from drying out. Now, let the dough rest for 30 to 45 minutes in a warm spot in your kitchen. The temperature of your kitchen will affect how quickly things start to happen, so aim for somewhere cozy—not cold.
What’s happening here?
This stage is called the autolyse (say it like “auto-lees”), and it’s a fancy word for a simple thing: letting the flour fully absorb the water. This improves the dough’s elasticity and helps start gluten development, all without kneading.
Tip: Don’t skip the autolyse!
It may seem like “just resting,” but this pause in your process is the secret to making the dough easier to work with later. It also kickstarts the fermentation process and gives your loaf a better texture and structure. This is one of those best tips that sourdough bakers swear by.

What to Expect
Your dough will look shaggy, lumpy, and maybe even a little sad right now—and that’s normal! It will be sticky to the touch, and you may think something's wrong, especially if you’re used to firmer commercial yeast doughs. Just trust the process.
You’ve just taken your first real step toward that golden, crispy crust and soft, chewy interior. Let’s keep going.

Step 2: Add Salt & First Stretch and Fold
Time to season and strengthen your dough
Now that your dough has had its first rest (autolyse), it's time to add the 10g (1 3/4 tsp) fine sea salt. Sprinkle it evenly over the dough. Don’t worry if it seems like a lot—it’s essential not just for flavor, but also for strengthening the dough structure.
Gently mix the salt in by using a method called the stretch and fold. Here’s how:
With wet hands (so the dough doesn’t stick), grab one side of the dough,
Stretch it up gently,
Fold it over onto itself.
Give the bowl a quarter turn and repeat this motion 3–4 more times.
You’ve just done your first stretch and fold!
Cover the bowl again with a damp towel or plastic wrap and let the dough rest in a warm place for about 30 minutes.
Tip: Why not knead?
This method replaces traditional kneading. Stretching and folding over time builds surface tension and structure while keeping the dough airy and soft inside. It’s the easiest way to strengthen your dough without wearing out your arms (or pulling out your stand mixer).
What to Expect
After the first fold, the dough will still feel pretty loose, sticky, and maybe even a little uncooperative. That’s okay!
As you repeat this process throughout the bulk fermentation, the dough will become smoother, stronger, and more elastic. You’ll start to feel the magic of the fermentation process at work.
Think of this as the “training” stage of your dough—it’s learning how to hold itself up and become something wonderful.

How to Tell if Your Kitchen is Too Cold
Sourdough is a little bit like us—it likes to be cozy to thrive! If your dough is slow to rise, doesn’t look puffier after a couple hours, or feels dense and stiff even after resting, chances are your kitchen is too cold.
Here are some signs your dough might be chilly:
After 1–2 hours of bulk fermentation, it looks nearly the same as when you started.
The dough feels tight instead of pillowy.
You’re not seeing many bubbles or signs of fermentation.
Your proofing basket still looks empty after hours of waiting.
Simple Ways to Warm Things Up
Place your dough in the oven (turned off) with just the oven light on.
Set it near a sunny window, heater, or warm appliance (like the top of the fridge).
Put it inside a microwave with a cup of hot water to create a steamy warm spot.
Wrap the bowl in a damp tea towel and place it in a plastic bag to trap warmth.
Ideal dough temperature is around 75°F to 80°F (24°C to 27°C). Cold kitchens = slower rises, which can be okay—but if it’s too cold, the dough won’t develop properly.
Still unsure? Trust your gut—and your dough. If it’s not rising, give it more time in a warmer spot before moving on.
Step 3: Stretch & Fold Schedule
(AKA dough building time!)
Now that the salt is in and your dough has had its first stretch, you’ll repeat this stretch and fold technique several more times during the bulk fermentation stage. This strengthens the gluten, builds surface tension, and helps your dough hold its shape—no kneading needed!
You’ll do 3–4 more rounds of stretch and folds, spaced out every 30–45 minutes. That means over the next couple of hours, you’ll be building your dough’s structure bit by bit.
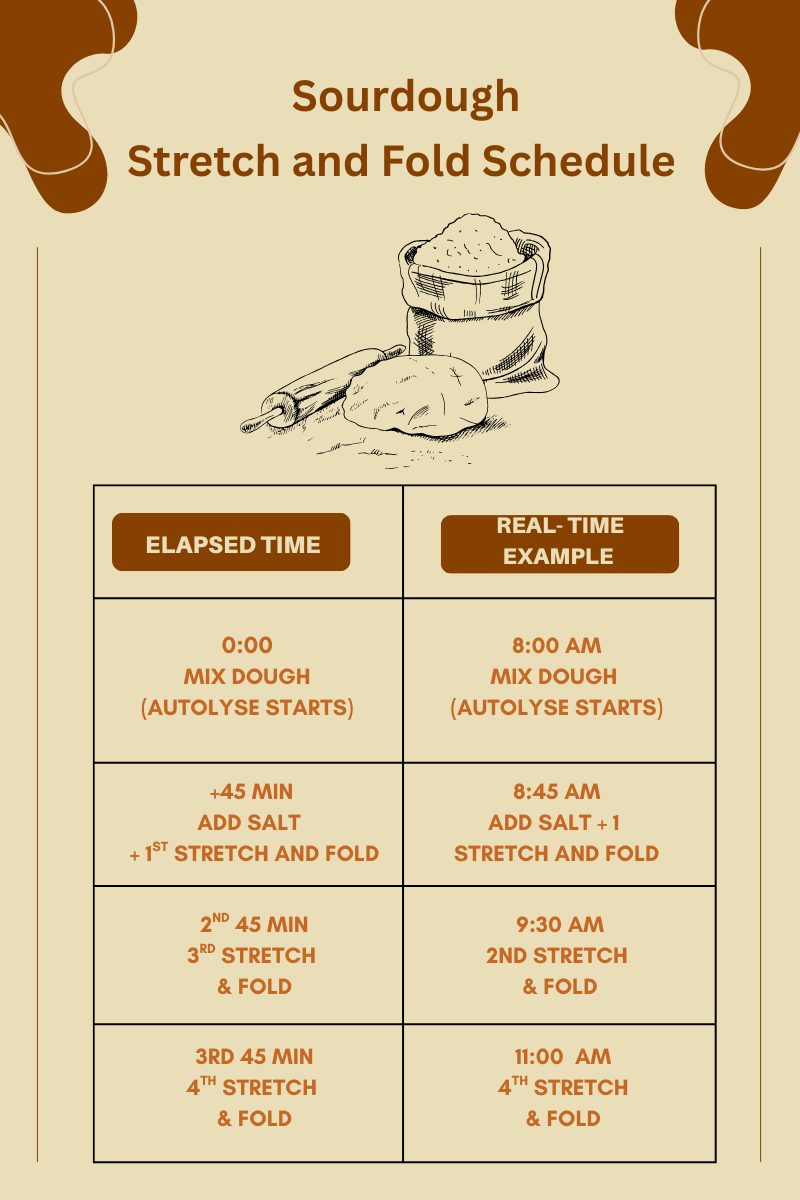
Stretch & Fold Timeline (Elapsed Time)
This schedule starts when you finish mixing the dough—that’s your “0:00.”
0:00
Mix dough (autolyse starts)
+45 min
Add salt + 1st stretch & fold
+45 min
2nd stretch & fold
+45 min
3rd stretch & fold
+45 min
4th stretch & fold
~+60–90 min
Bulk fermentation continues until dough has doubled in size and feels airy
Step 4: Finish Bulk Fermentation & Shape the Dough
After your final stretch and fold, it’s time to let your dough rest undisturbed in a warm spot so it can continue rising and fermenting. This is when the wild yeasts and good bacteria from your active sourdough starter are doing the heavy lifting, transforming your dough into that future golden brown, crispy crusted, homemade sourdough bread dream.
How Long to Let It Rise?
Your dough will typically need 1 to 2 more hours after the last fold, depending on the temperature of your kitchen. You’re looking for it to roughly double in size and become airy, jiggly, and alive.
💡 Tip: Give the bowl a gentle wiggle—if the dough jiggles like a soft jelly and looks puffed up with bubbles near the surface or sides, it’s ready to shape!
If your kitchen is chilly, refer back to the sidebar, or try placing the bowl somewhere cozier like:
On top of the fridge
Inside the oven with the light on
Near a cup of warm water in a closed microwave
Refrigerate Before Shaping?
Don’t have time to move forward right away? No problem! Pop the covered bowl into the fridge overnight (up to 12–14 hours). This can actually improve oven spring and give your loaf more flavor. Cold dough is also easier to shape and less sticky!

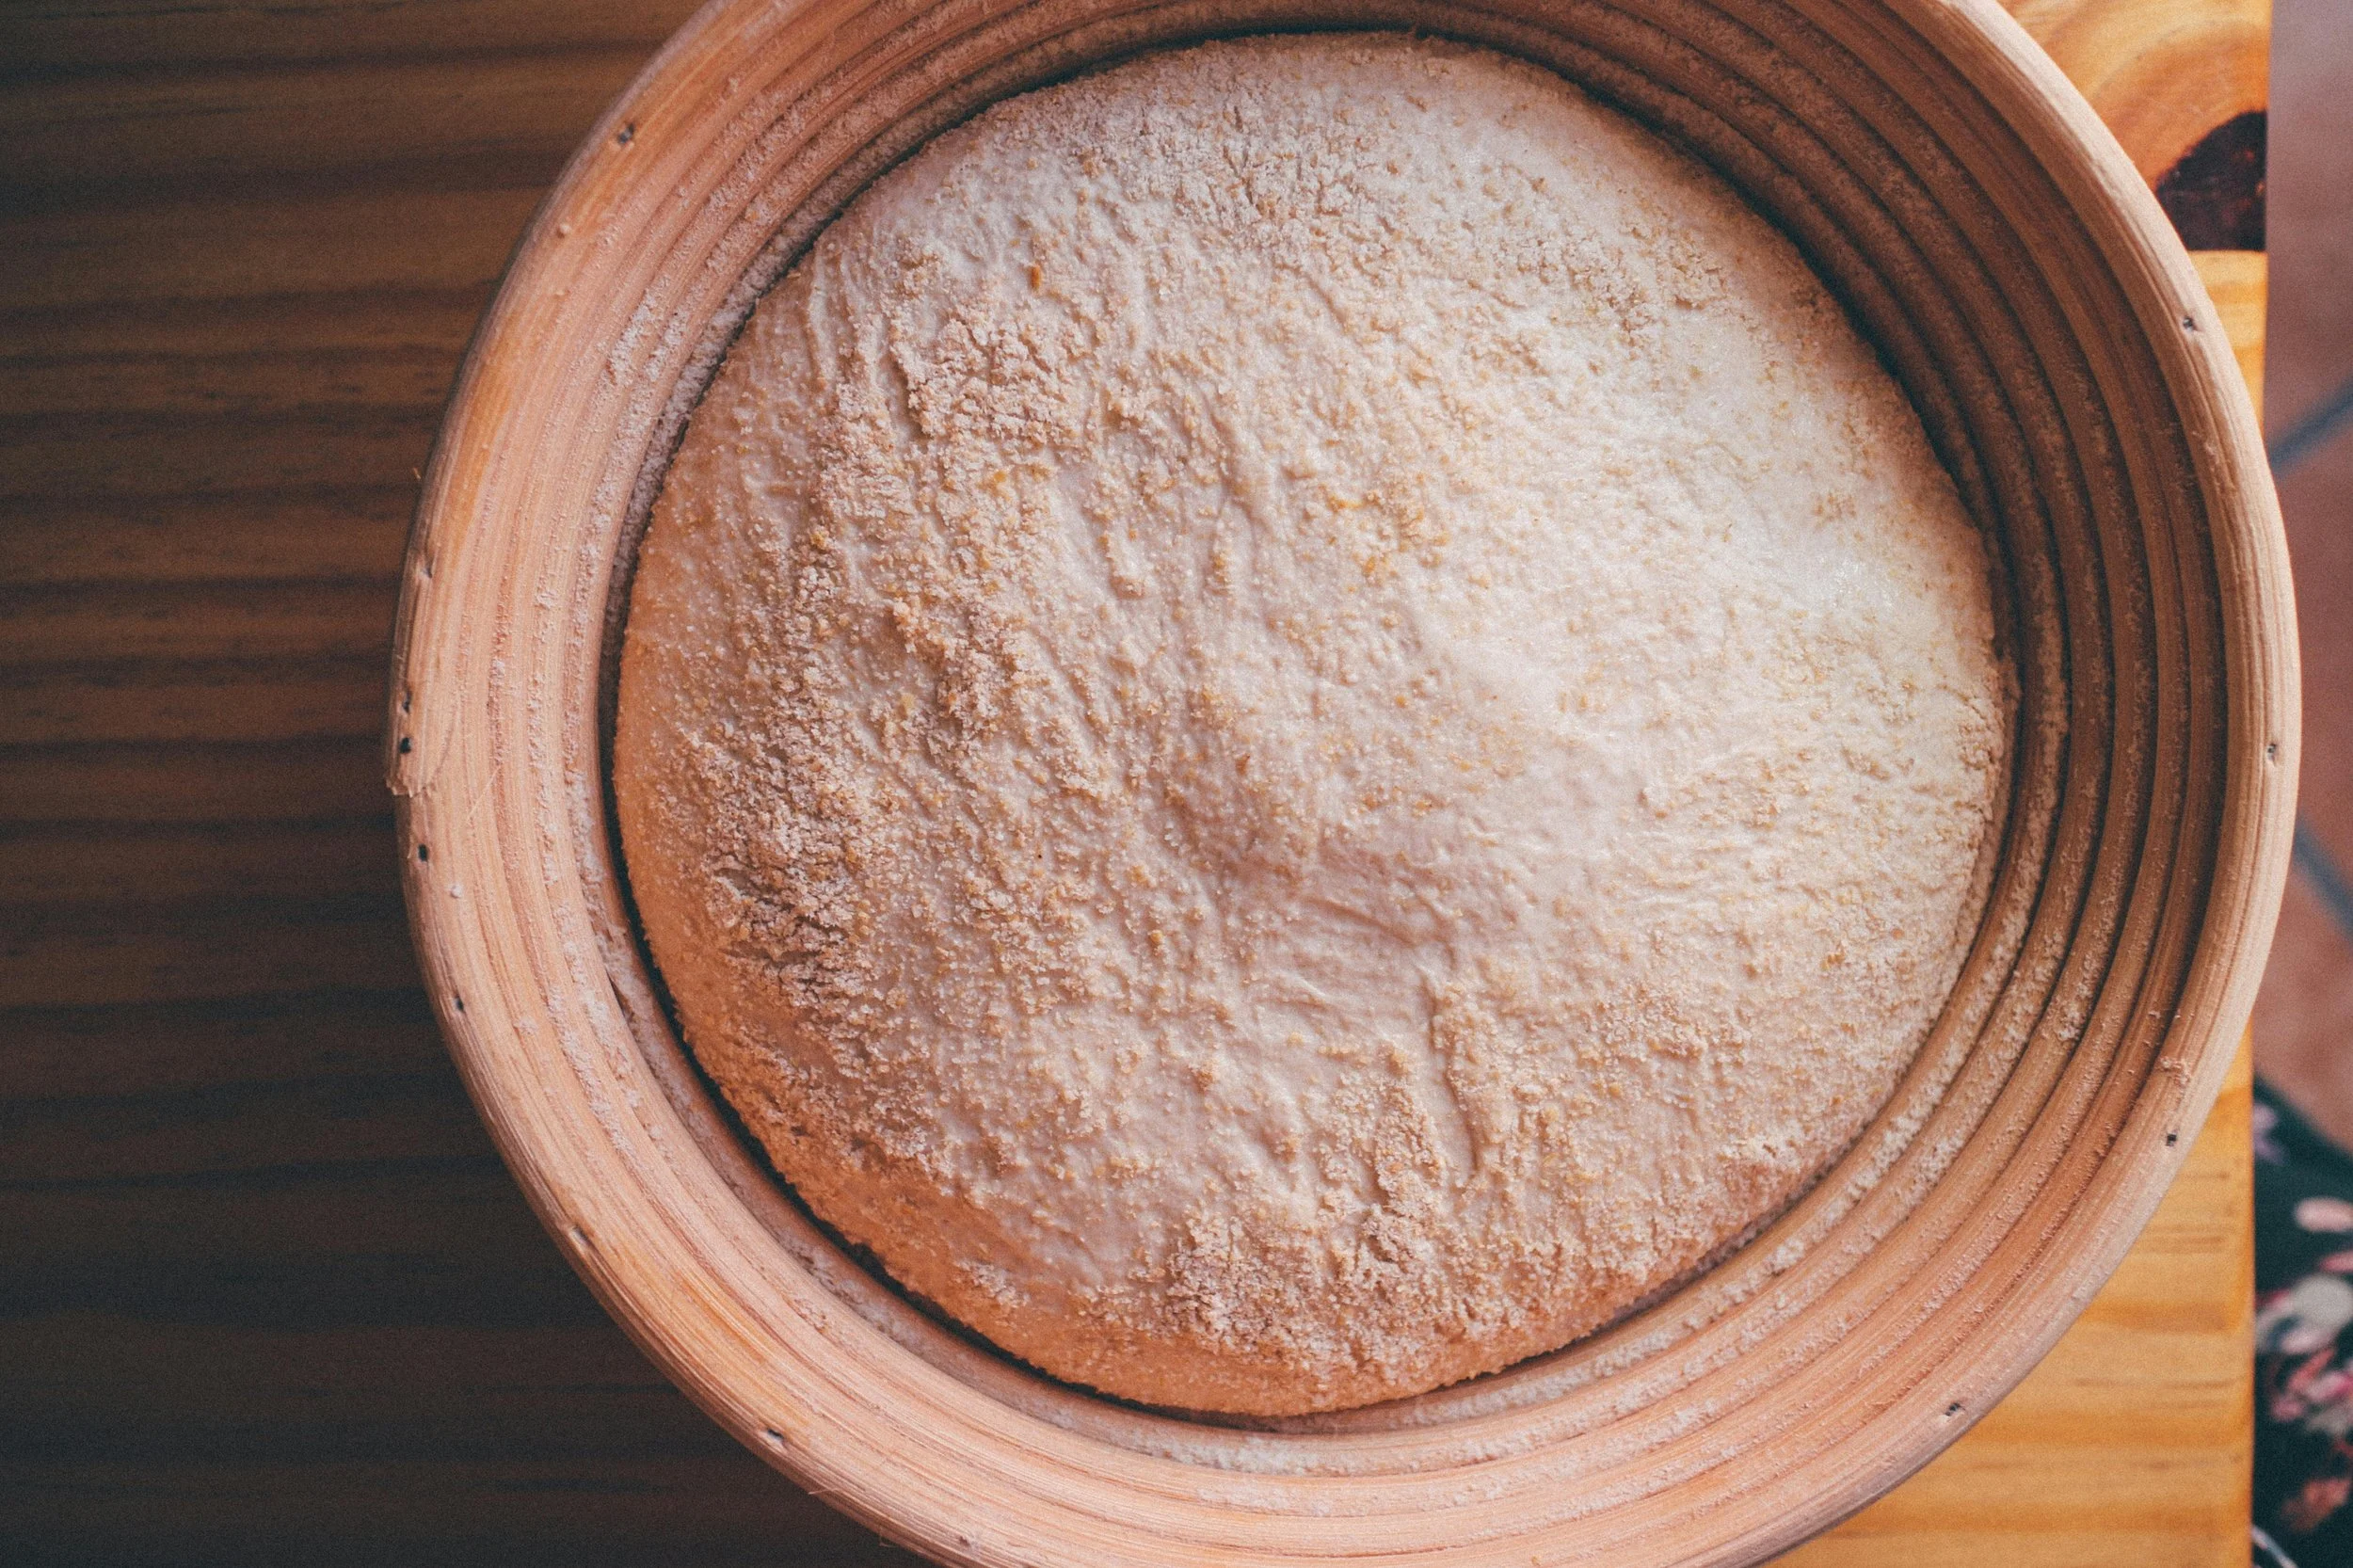
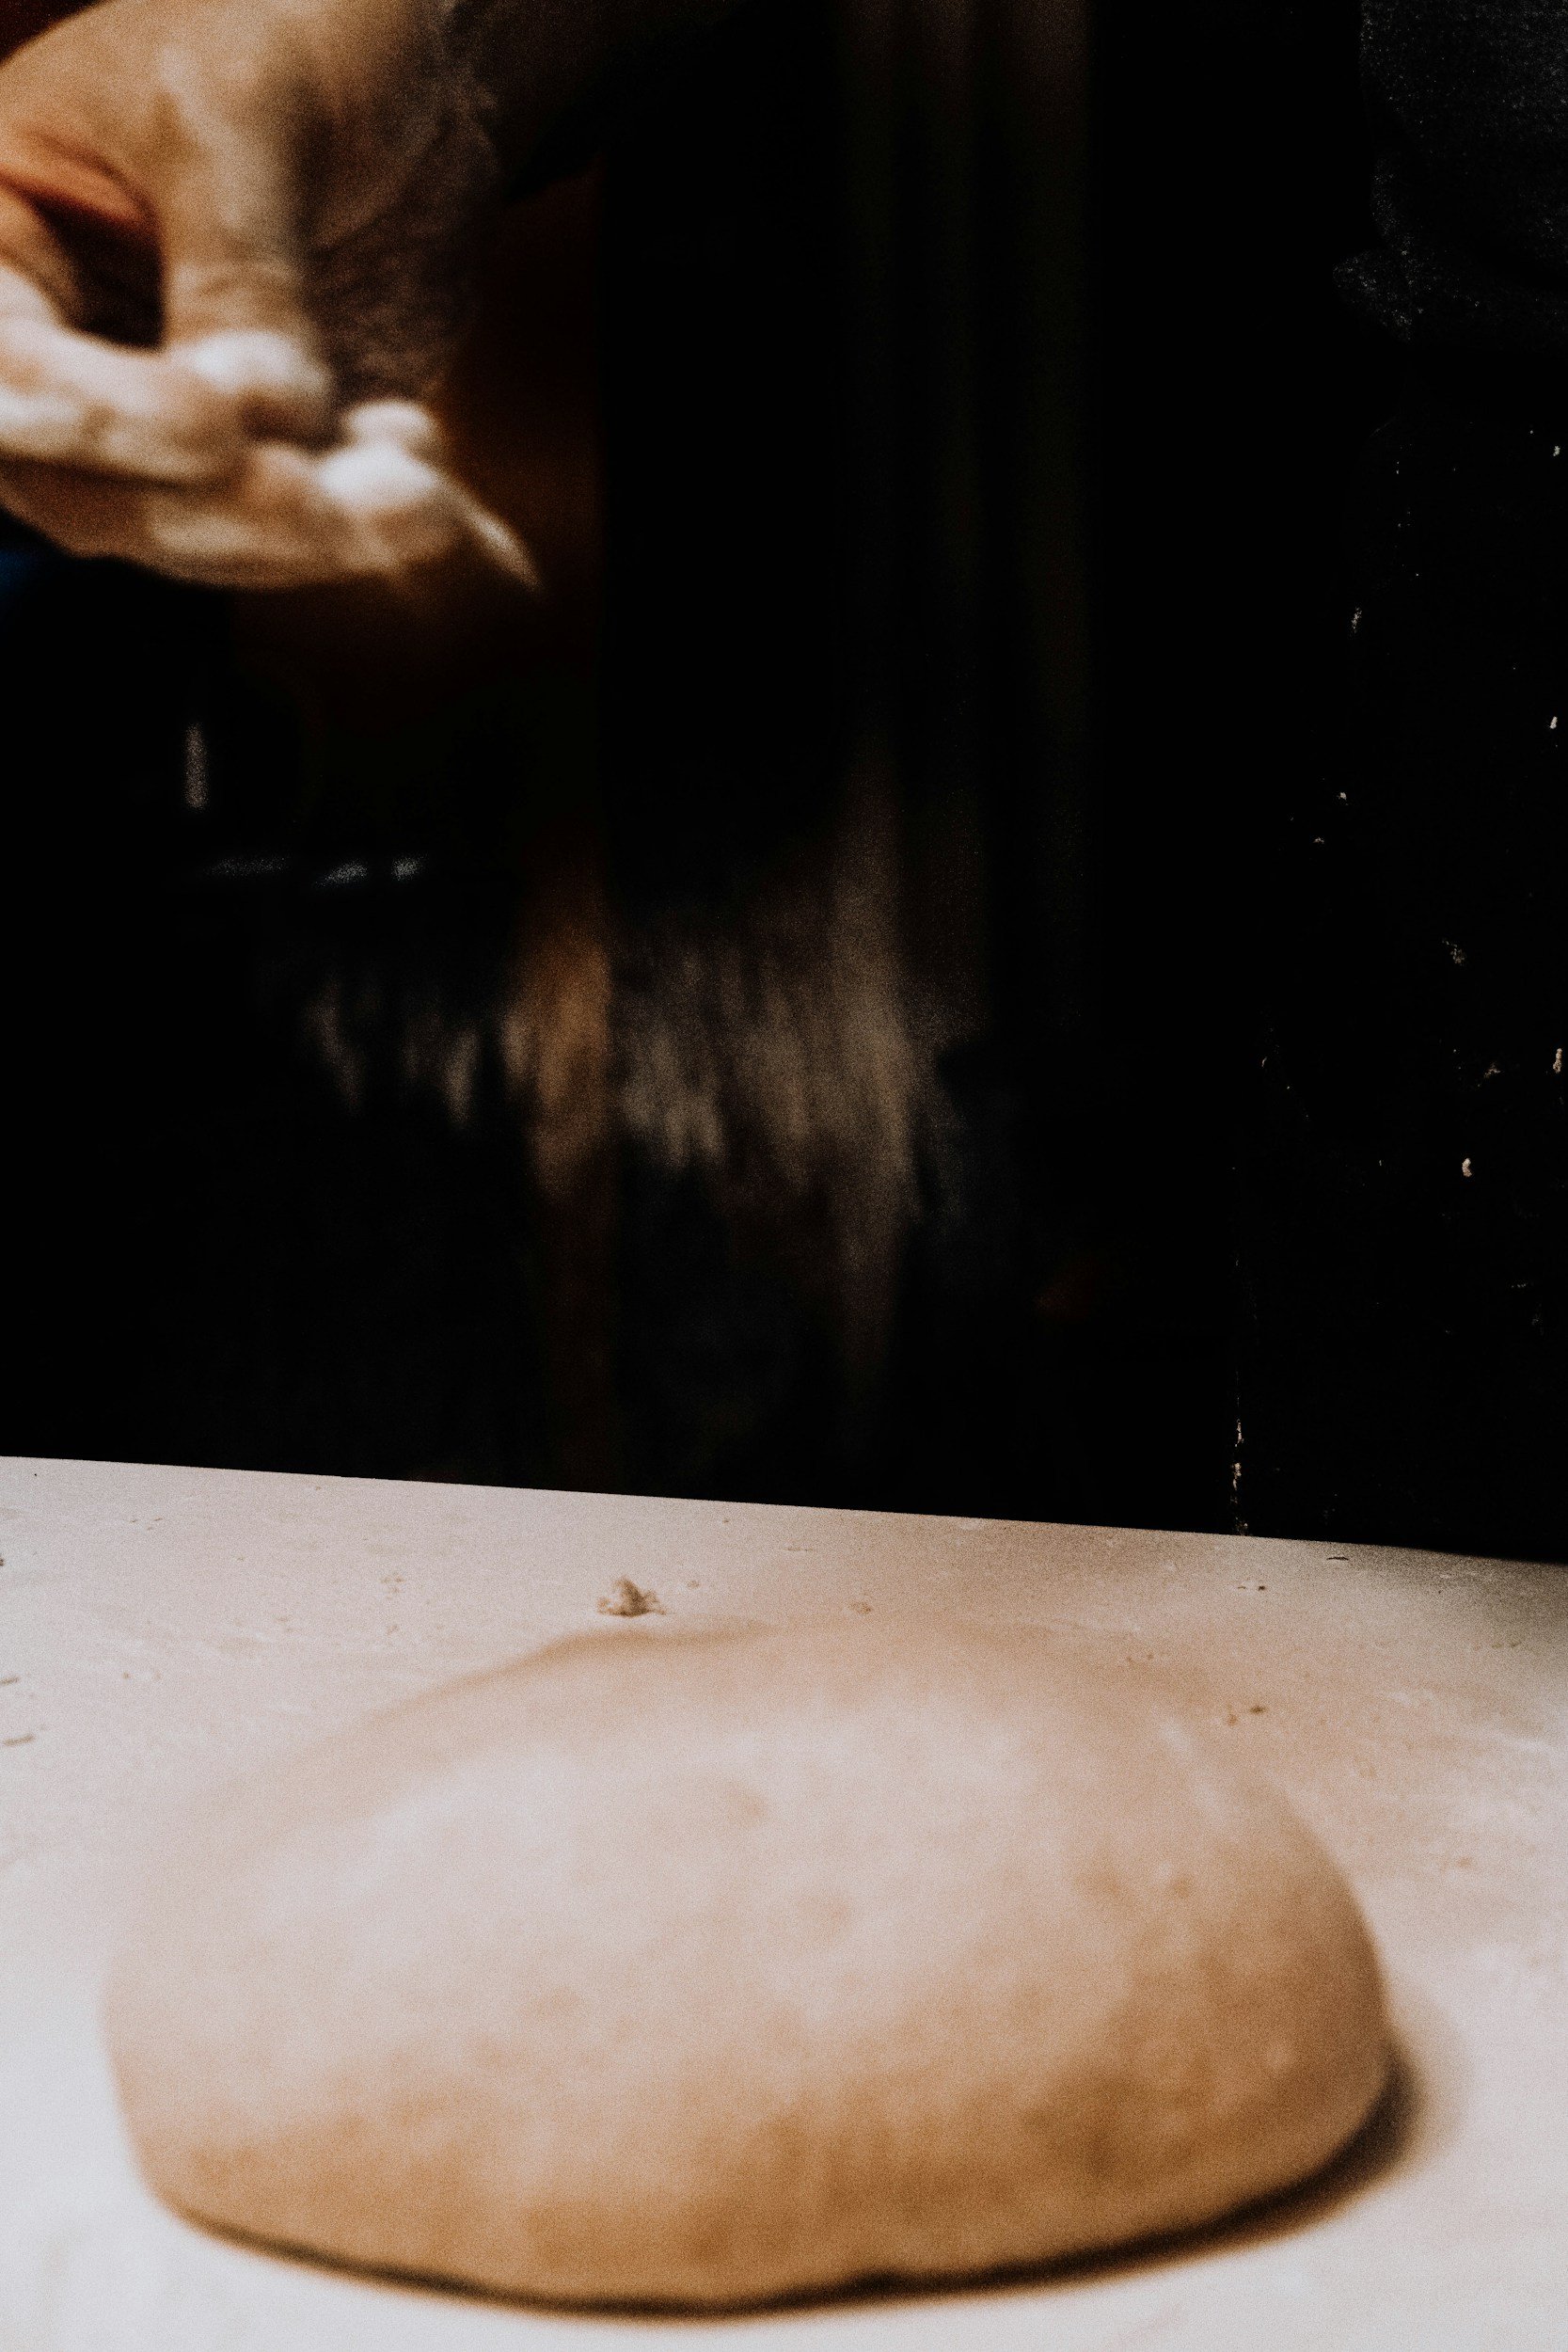
Step 5: Shaping Your Dough
This is the part where your dough becomes a loaf—like a little transformation moment.
Lightly flour your surface with a mix of rice flour and all-purpose flour for best results.
Gently turn out your dough using a bench scraper.
With wet hands, give it a couple of quarter turns and tuck the edges underneath to form a smooth ball. This builds surface tension, which helps your loaf hold its shape.
If you’re using a loaf pan, you can shape it into more of an oval log. For a banneton basket or a bowl with a floured tea towel, keep that round shape and nestle it in, seam-side up.
What to Expect:
Dough will feel soft but hold together with some bounce.
You might see some air bubbles on top—don’t pop them! That’s the magic.
If it flattens quickly after shaping, don’t worry—you can always let it rest, reshape, and try again. Next time, it will be easier!
Step 6: Final Proof (Let the Dough Rise Again)
Once your dough is shaped, it’s time for the final proof—this is the last rise before baking. Think of it as the dough’s chance to relax, get comfy, and finish fermenting into something truly magical.
You’ll gently place your shaped dough into a proofing basket (or a bowl lined with a damp tea towel), dusted with rice flour or a light mixture of flour to keep it from sticking. Cover it with a damp towel, plastic wrap, or slip the whole thing into a plastic bag—we just want to keep that dough nice and hydrated, not dried out.
Choose Your Proofing Path:
Same-Day Bake (Room Temp):
Let the dough rise for 1 to 2 hours at room temperature, until it feels puffy and slightly springy when gently poked.
Cold Proof (Overnight):
For even better flavor, easier handling, and a more developed crispy crust, you can proof your dough in the fridge overnight (8–14 hours). This long, cold fermentation slows things down, which boosts flavor and helps your dough hold shape beautifully when it hits the hot Dutch oven.
Good idea: The cold proof is beginner-friendly because it gives you more flexibility and makes scoring the dough easier.
What to Expect
Your dough will look soft and pillowy after this rise.
A gentle poke should leave a slow-to-bounce-back dent—this means it’s ready!
If the dough springs back immediately, it may need more time.
If it stays indented and seems fragile, it may be slightly over-proofed—but don’t worry, it can still bake up beautifully. It’s all part of the sourdough journey.
Quick Tip
For best results, let your final proof match your kitchen’s rhythm:
Cold temperatures? Go for the overnight proof.
Warm place? A shorter, same-day proof will do just fine.
the moment you’ve been dreaming about since your first loaf of sourdough bread idea sparked to life: BAKING TIME
This is where your simple sourdough bread transforms into a homemade artisan masterpiece, right in your kitchen. Get ready for that smell to fill your home. Let’s dive into scoring, baking, and what to expect when your sourdough loaf hits that hot Dutch oven.
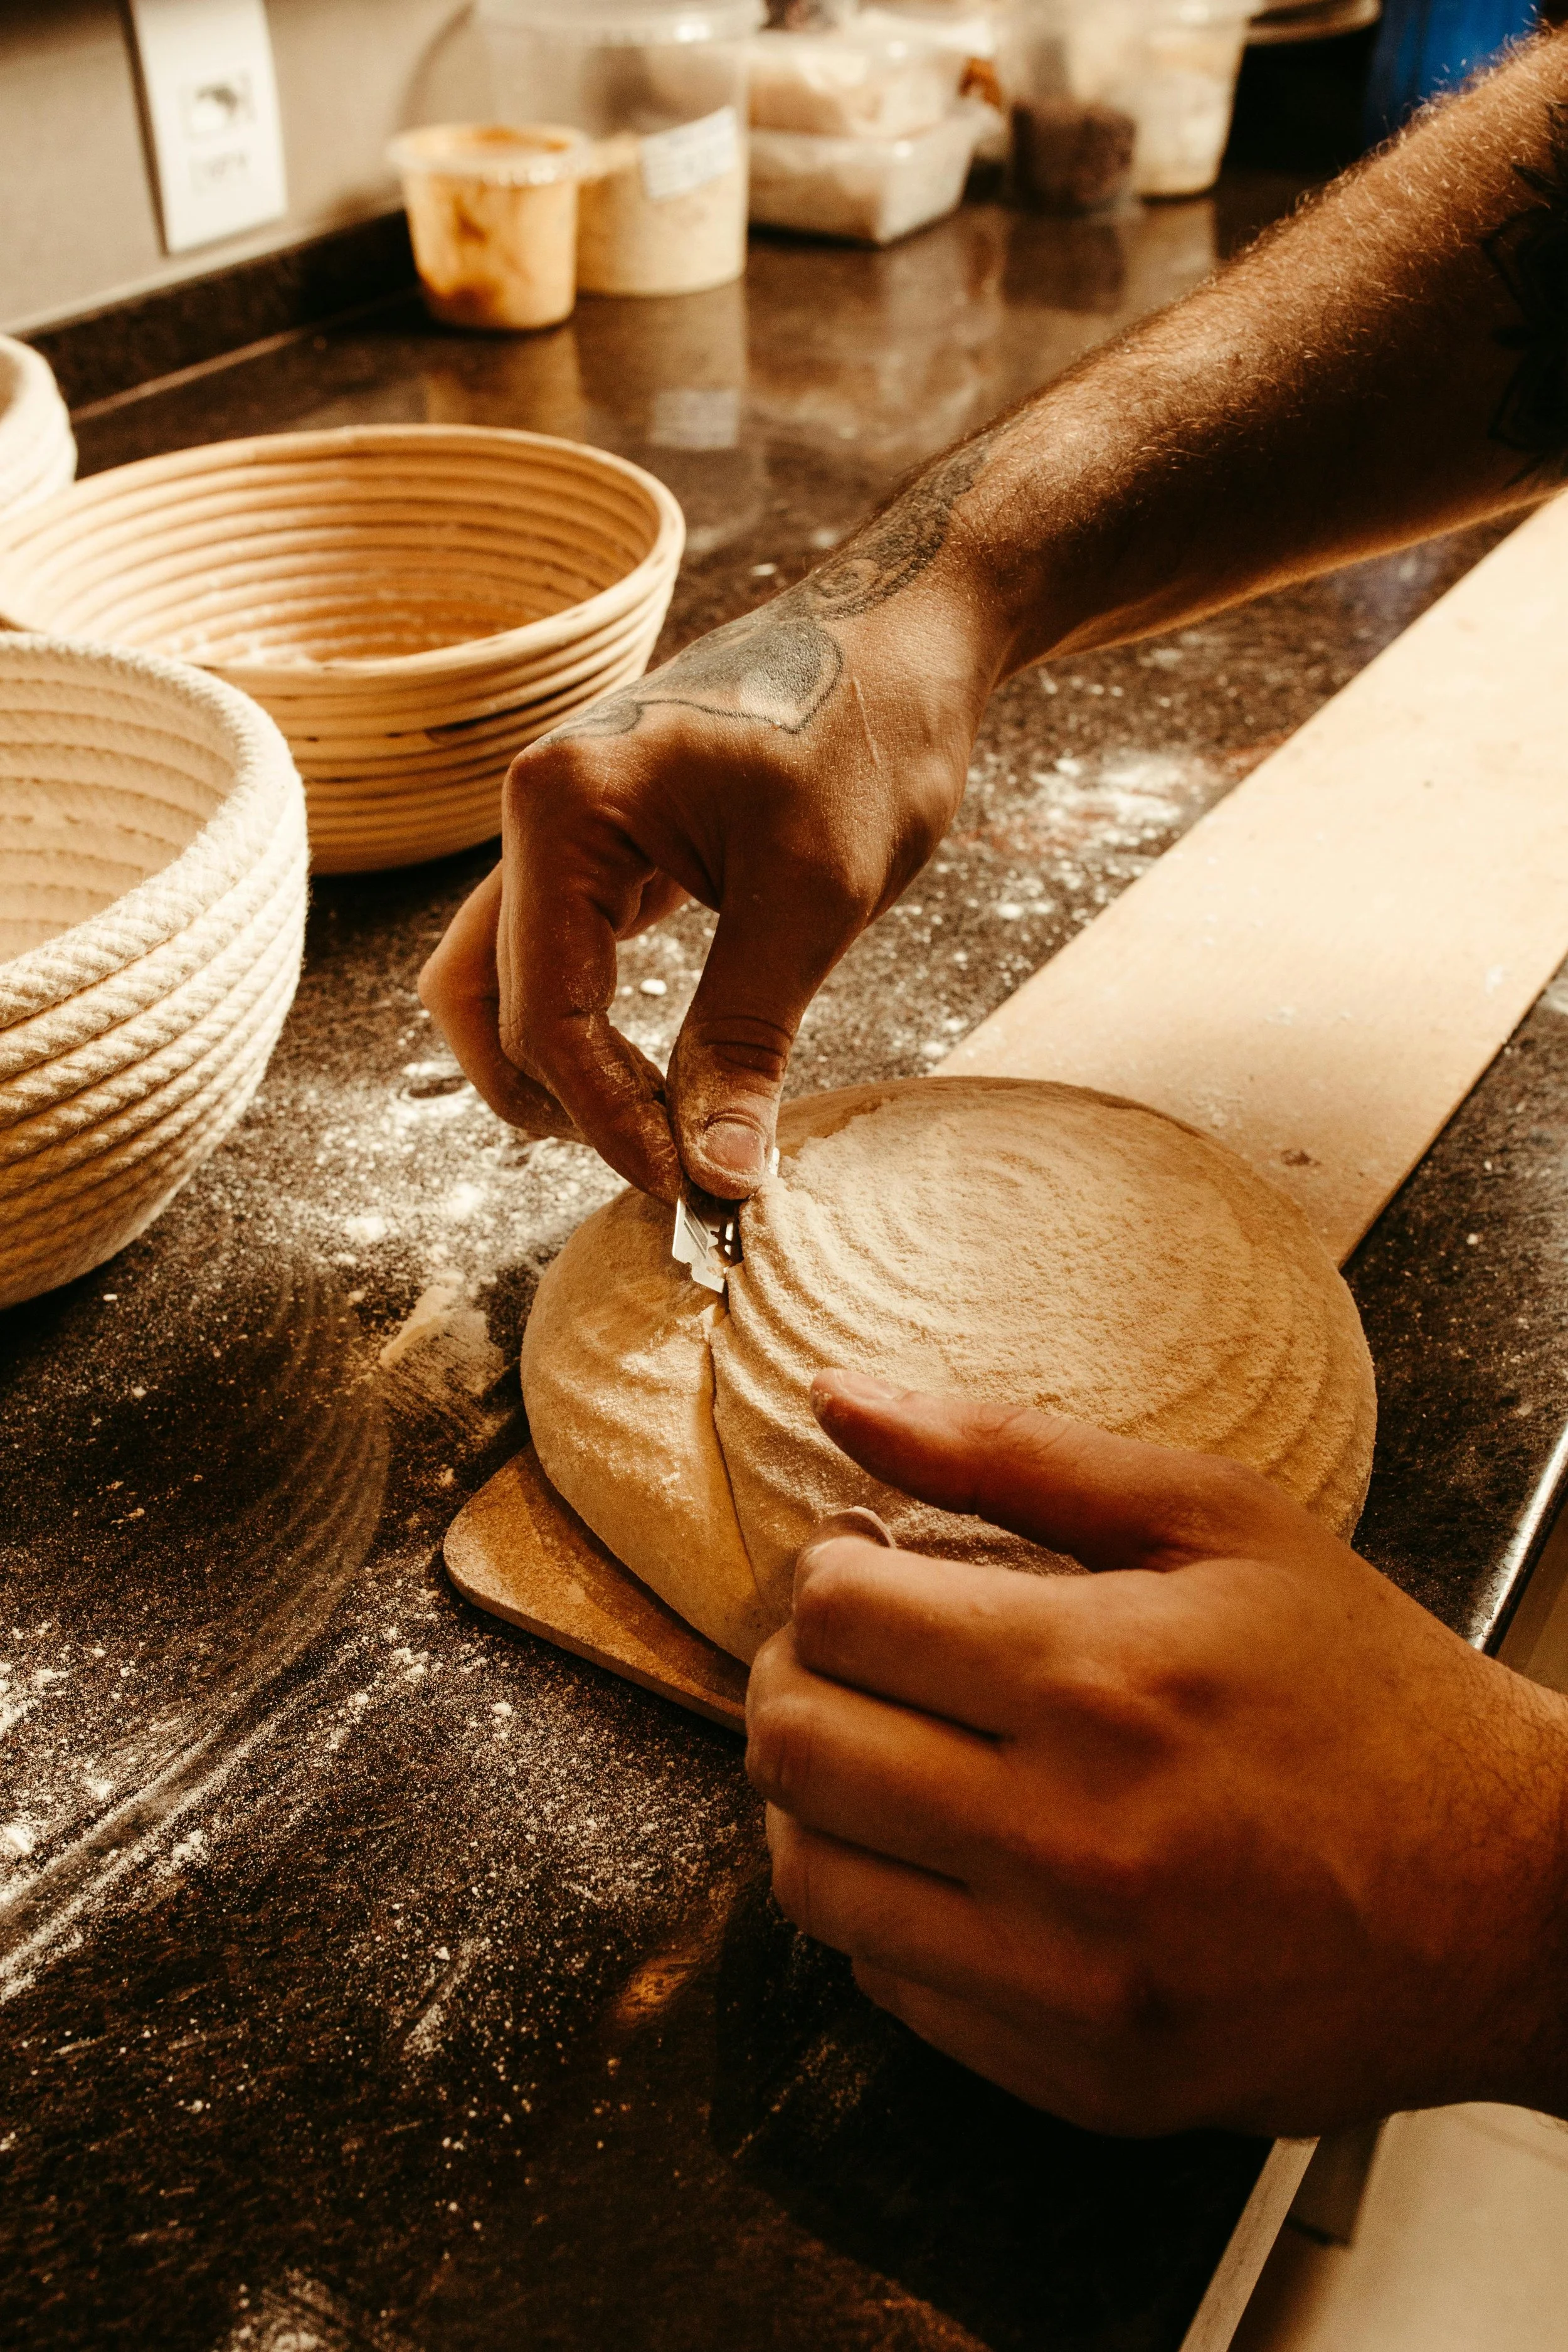
Step 7: Score & Bake Your Dough
Once your dough is fully proofed and the oven is preheating, it’s go time. You’ll want to work quickly but gently—remember, your dough is alive and ready!
Preheat That Oven
Place your cast iron Dutch oven (or baking vessel) into the oven while it preheats to 450°F (232°C).
Let it heat for at least 30 minutes—a properly heated Dutch oven is key for a strong oven spring and a crispy crust.
Best tip: Preheat first thing when you wake up (if you’re doing a cold proof). That way, you’re not just pacing around waiting while your dough is chillin’.
Prep Your Dough for Baking
Cut a piece of parchment paper slightly larger than your dough.
Turn your dough out of the proofing basket onto the parchment, smooth side up.
Optional but helpful: Dust the top of the dough with a light layer of rice flour for a pretty, rustic look and easier scoring.
Score Your Loaf
Use a lame, razor blade, or sharp knife to make a clean cut across the top of the dough—this tells the bread where to expand while baking. A single, confident slash is enough for your first time.
Tip: Shallow cuts = controlled expansion. Deep cuts may flatten your dough. Think confident swipe, not sawing motion.


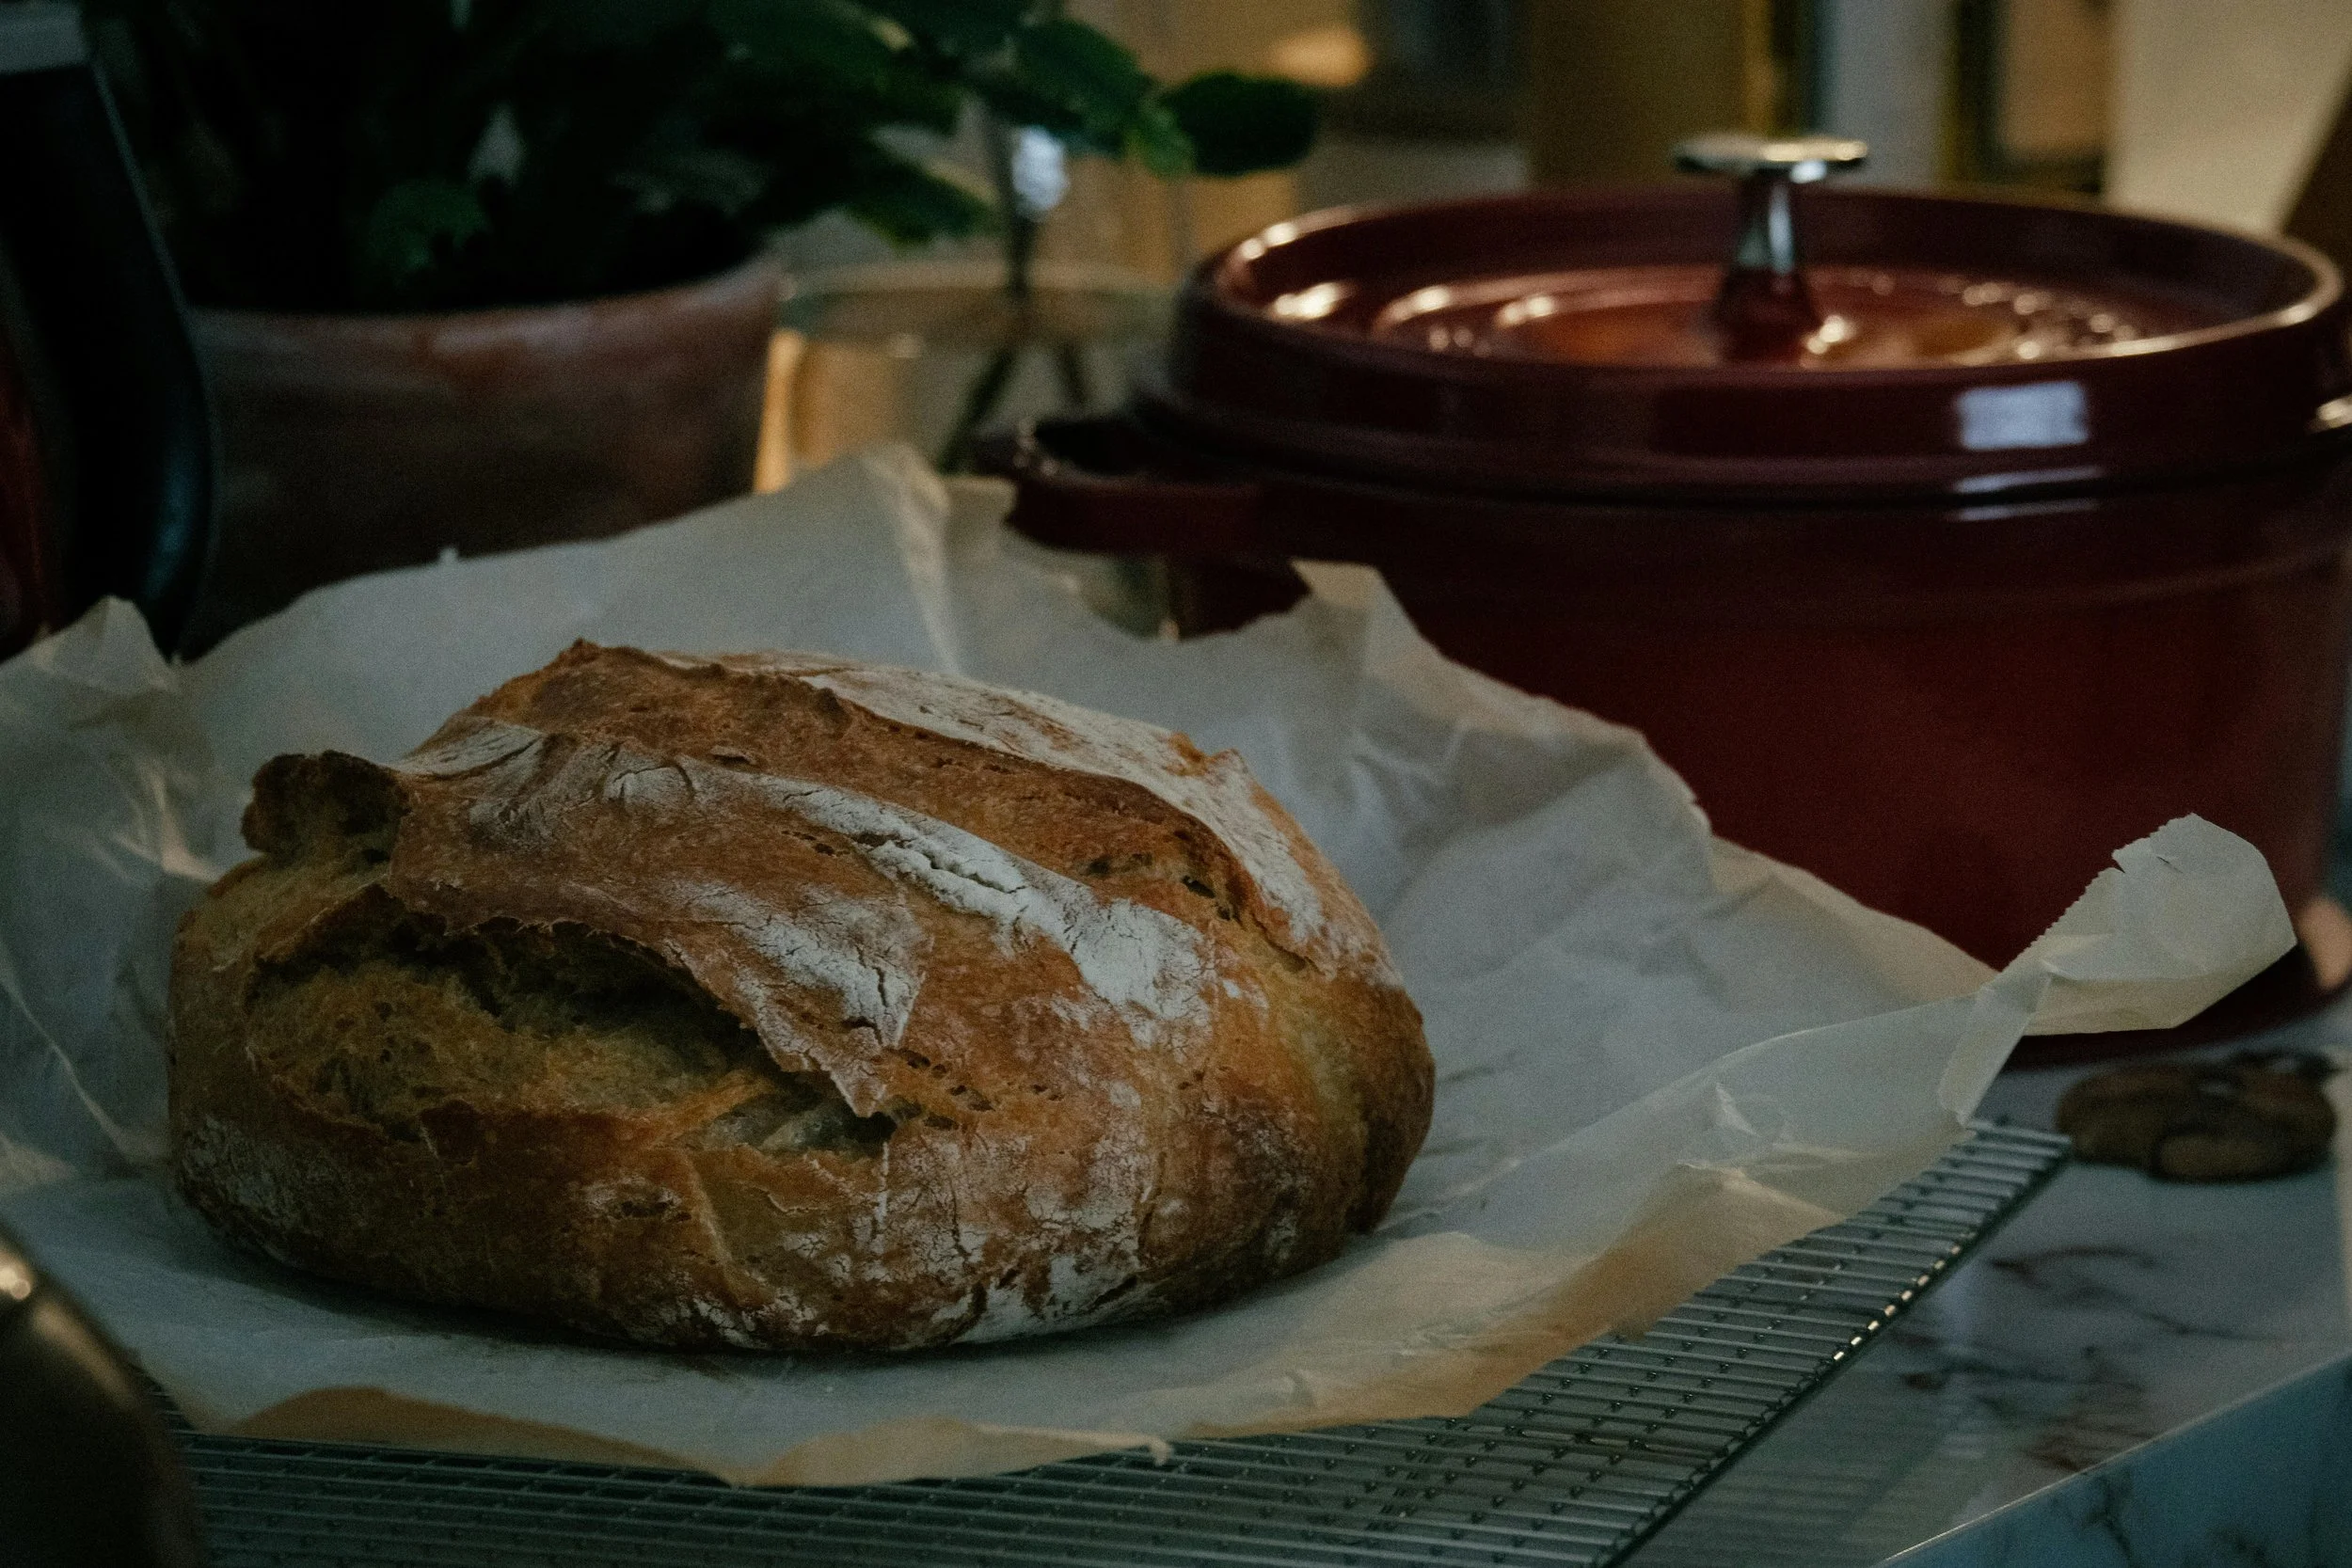
Bake Your Beauty
Transfer the dough (with parchment paper) into the hot Dutch oven.
Cover with the lid and bake for 20 minutes—this traps steam and helps form that shiny, golden brown crust.
Remove the lid and bake for another 20–25 minutes, until deep golden and crackly.
What to Expect: Your kitchen will smell amazing. Your loaf may crackle and sing as it cools—this is normal and sourdough love in action.
Let It Cool
This might be the most challenging part… but let your loaf cool for at least 1 hour before slicing. This allows the crumb to set and prevents it from becoming gummy.
Next time: You’ll notice subtle changes with each bake—this is the magic of learning by doing. No two loaves are the same, and that’s a good thing!
Final Thoughts & Troubleshooting Your First Loaf
So maybe your first loaf of sourdough bread didn’t turn out exactly how you hoped. Maybe the crumb was dense, or it didn’t rise as much as you'd imagined, or the crust was more tough than crispy. It’s okay. I’ve been there. More than once. Actually... more than five times.
Let’s talk about why it might’ve happened and what to do next time.
Common First-Time Flops (and Fixes)
1. Flat or Spread-Out Loaf
What Happened: Dough was likely over-proofed, under-proofed, or lacked enough surface tension when shaped.
Try This Next Time: Shape tighter and watch the proofing window more closely. Use the poke test to help judge readiness.
2. Dense, Gummy Center
What Happened: It could be underbaked or the dough needed more bulk fermentation time.
Try This Next Time: Extend your first rise, check for proper fermentation signs (like the float test), and be patient. Bake 5–10 mins longer with the lid off if needed.
3. Pale or Soft Crust
What Happened: Oven may not have been hot enough, or steam escaped too early.
Try This Next Time: Be sure to preheat your Dutch oven for a full 30 minutes. Bake covered for at least 20–25 minutes.
4. Too Sour or Too Bland
What Happened: Fermentation times or starter strength could be the culprit.
Try This Next Time: Use a bubbly sourdough starter that’s fed and active. Adjust bulk or cold ferment time based on flavor preference.
Encouragement for the Sourdough Soul
You’re not alone. Even seasoned bakers still get the occasional “meh” loaf. That doesn’t mean you failed—it means you’re baking real bread, with real wild yeasts, and letting nature do its beautiful, unpredictable thing.
It takes practice to learn how your dough behaves in your kitchen's temperature, with your flour, your timing, and your hands. Every bake is a teacher. And honestly, the first time your loaf turns out with that golden brown crust, crackly sound, and springy open crumb, you’ll forget all about the earlier flops.
What to Do With a “Flop” Loaf
Please don’t toss it! Even a not-so-perfect sourdough loaf has so much life left in it:
Turn it into croutons – cube it, toss with olive oil and salt, bake until crunchy.
Make sourdough breadcrumbs – pulse in a food processor and store in the freezer.
French toast or bread pudding – a dense loaf is actually perfect here!
Grilled cheese sandwiches – toastiness covers all flaws.
Sourdough strata or casserole base – savory or sweet, it soaks up flavor like a champ.
Good thing: Your “bad” loaf may be the best ingredient for your next recipe.
Final Encouragement
If you made it this far—you baked a loaf of bread from your own sourdough starter. That’s a HUGE win. Whether your loaf looked like a magazine cover or a deflated balloon, you did the thing. You fed your starter. You mixed, folded, shaped, and baked. That’s something to be proud of.
Next time? You’ll learn something new again. And before you know it, you’ll be pulling easy sourdough bread from the oven like a pro—and sharing your extra bubbly starter with a neighbor.
Keep going. You’ve got this.
My Favorite Sourdough Tools (That Make Life Easier)
If you're just starting out on your sourdough journey, having the right tools can truly make a difference—not just for results, but for making the process smoother and more enjoyable.
Over time, I’ve tested out quite a few things (and let’s be honest—fallen into a few late-night sourdough Amazon rabbit holes). These are the tried-and-true items I personally use and love in my own kitchen.
✨ Bonus: Many of these help solve little sourdough pain points—like keeping room temperature water ready, or getting a clean score with a sharp blade.
Handy Tools I Recommend:
Cast Iron Dutch Oven – For that unbeatable crispy crust and epic oven spring
Kitchen Scale – The best way to measure for consistent results every time
Proofing Basket Set (Banneton) – Makes shaping easier and your sourdough loaf look bakery-worthy
Sharp Scoring Lame or Razor Blade – For clean, confident scoring that makes your loaf pop
Bench Scraper – A game changer for handling sticky dough and shaping with ease
Filtered Water Dispenser – I keep this right on the counter for always-ready room temperature water
Flour Sack or Tea Towels – Perfect for covering dough during the bulk rise and proof
Blender (for discard recipes) – Turn sourdough discard into pancakes, muffins, or even smoothies!
🛒 Check out my full list of Amazon favorites below!
I may earn a small commission at no extra cost to you—but I only recommend what I truly love and use myself.